
Colour Capping Ideas: Add Ceiling Colour Without Painting the Whole Room
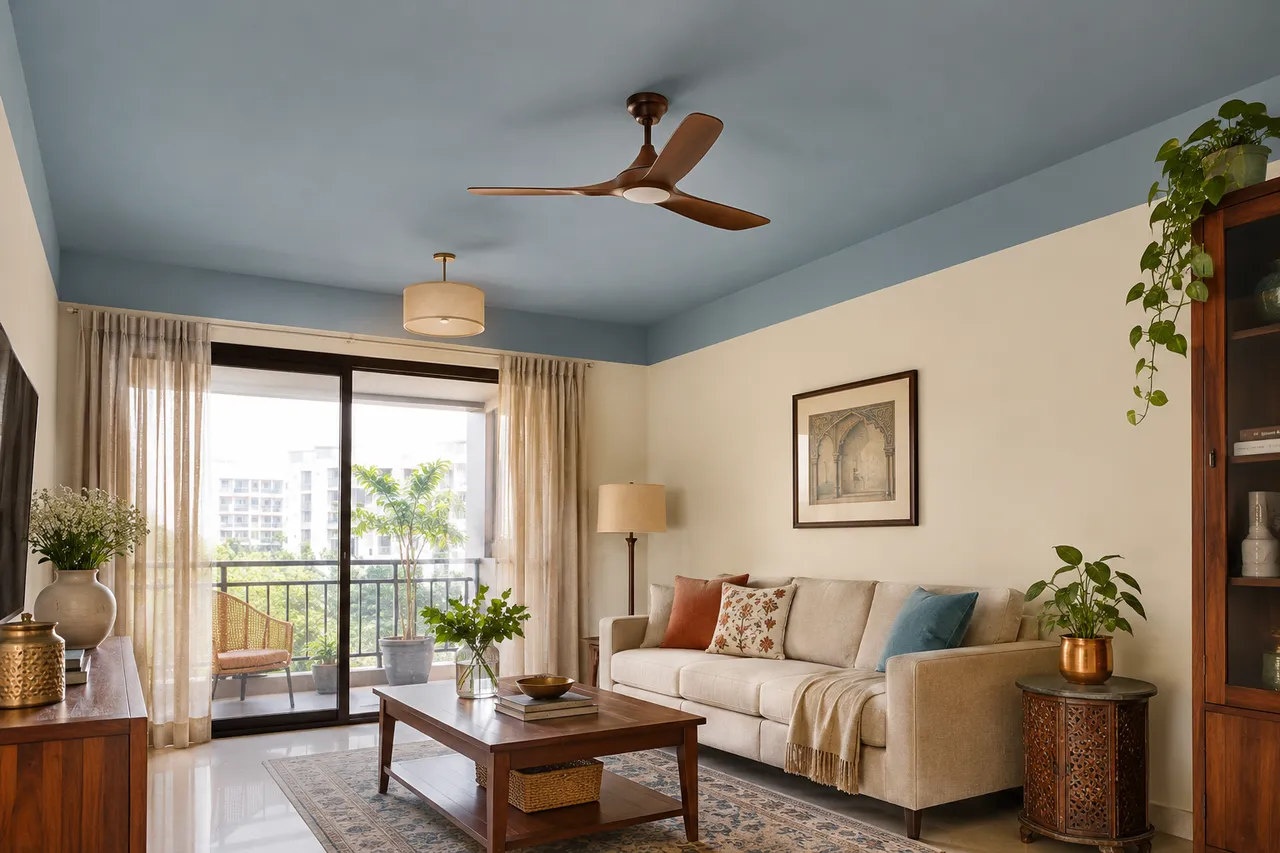
Colour capping concentrates colour on the ceiling and, if desired, a short band at the top of the walls while the lower walls stay different. Start with the room’s daylight, existing finishes and ceiling details, then approve a large sample and a clear paint boundary before asking a painter to quote.
Start here: the five decisions that matter
- Choose ceiling-only colour or a ceiling plus upper-wall band; show the exact stopping line.
- Select a colour against the walls, flooring and furniture you intend to retain.
- Test a large sample in the ceiling position under daylight and your normal evening lights.
- Check the existing surface, beams, cornices and fittings before agreeing preparation and application.
- Compare a written scope covering materials, coats, protection, edge work, access, cleaning and touch-ups.
Jump to the paint boundary, colour combinations, small rooms, the preparation sequence, cost and paint-area calculations or customer questions.
What is colour capping, and how is it different from colour drenching?
Colour capping, also written as color capping, is a decorating approach rather than a single product or application method. Designers use the term for colour concentrated overhead or around the upper edges of a room. Here, it means a coloured ceiling with an optional matching upper-wall band, leaving the lower walls in another shade. Tell the painter exactly which surfaces are included instead of ordering the trend name alone.
| Treatment | Where the colour goes | What stays different |
|---|---|---|
| Ceiling-only colour | Horizontal ceiling, stopping at its junction with the wall | Vertical walls and any excluded details |
| Ceiling plus upper-wall band | Ceiling and a clearly marked band on the walls | Lower walls below the agreed boundary |
| Colour drenching | A continuous colour scheme across larger wall and ceiling areas, sometimes other elements | Only the surfaces excluded from that scheme |
If you want the whole room to share a colour family, compare our colour-drenching bedroom guide. Choose the extent of painting from your room and preferred effect, rather than assuming the two approaches are interchangeable.
Where should the colour stop?
Use one of three clear boundaries: the wall-ceiling junction, a deliberately marked line below it, or an existing architectural division such as a beam or cornice. Photograph every wall and draw the proposed boundary across corners, door heads, curtain pelmets and fitted storage. A design that looks simple on one wall can become fragmented when it turns the corner.
There is no universal band depth. For a mock-up, you could compare a 150 mm and a 300 mm drop using surface-compatible temporary markers, then view both from the doorway and the main seat. These are trial dimensions, not design standards. A deeper band introduces more visible wall colour and may intersect a tall window, wardrobe or curtain detail. Choose the result in the room, then record the accepted measurement.
Check whether the existing junction is straight. A line following uneven plaster may expose that irregularity; a level line below it changes the visible band depth. Ask the painter to explain the proposed repair or setting-out method before application. Do not expect a new colour alone to correct a crooked surface.
Six colour combinations to sample in Indian homes
Start with fixed finishes: flooring, retained wood, kitchen fronts and the largest upholstery. Then choose a ceiling colour that works with those elements. The families below are starting points, not brand shade codes or guarantees that a digital image will match a painted surface.
| Ceiling or cap | Lower wall direction | Existing elements to compare | Sample check |
|---|---|---|---|
| Dusty blue | Warm off-white | Walnut, oak, beige upholstery | Does it become too cool beside your floor? |
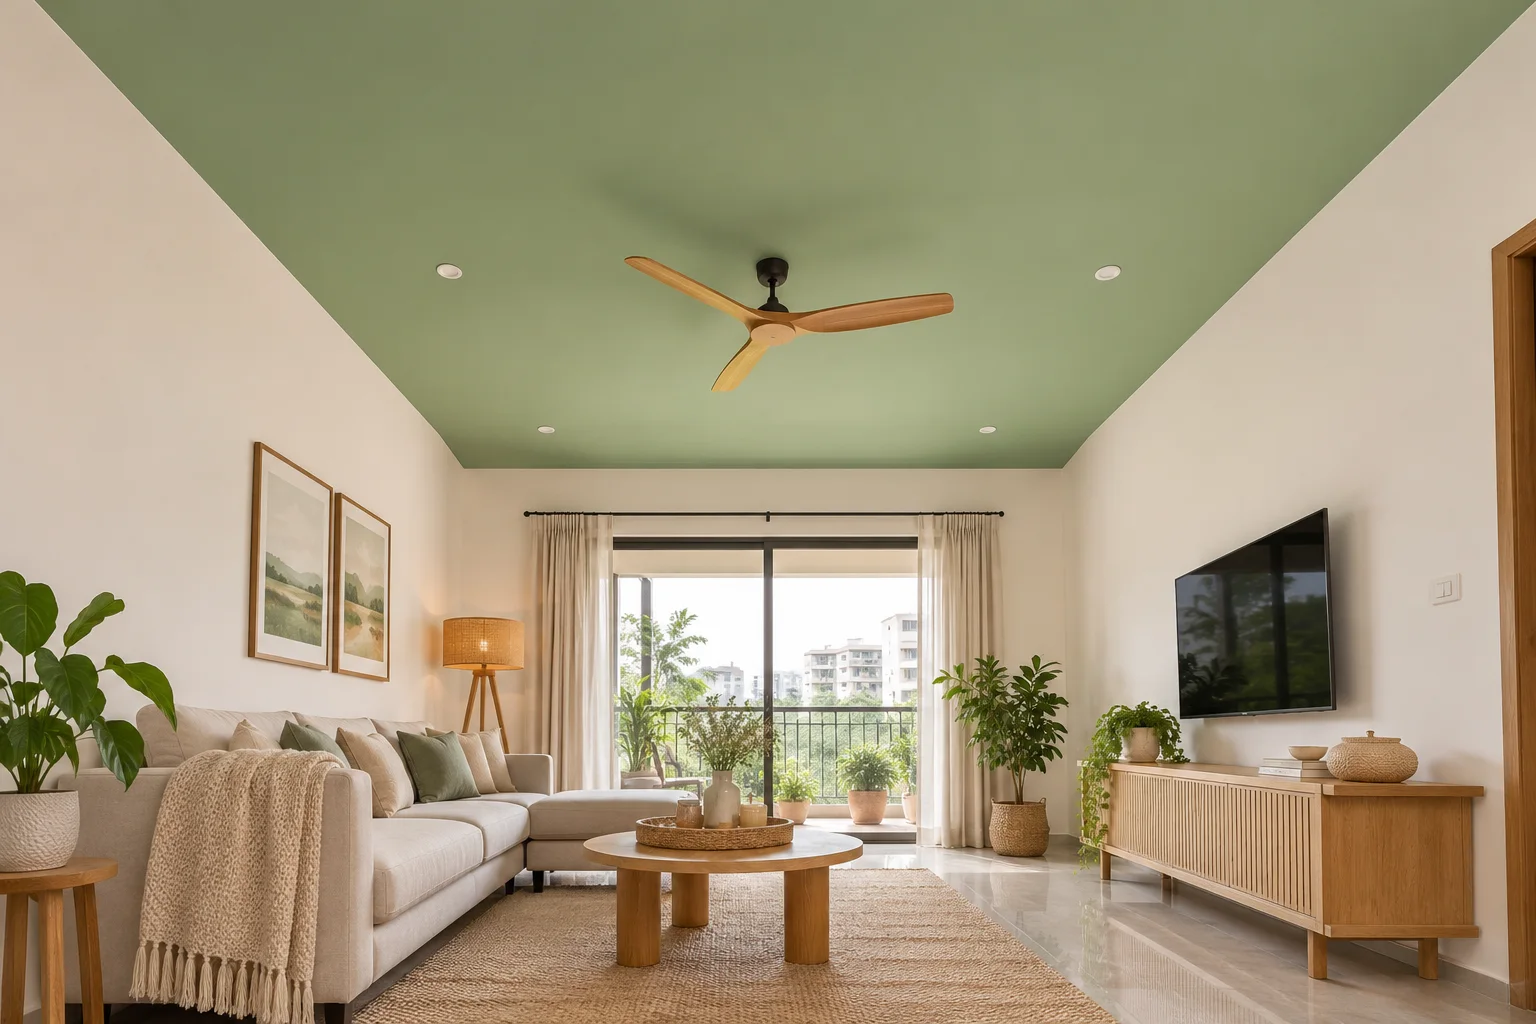
| Muted sage | Soft ivory | Natural wood, cane, linen | Does the green turn grey under evening lights? |
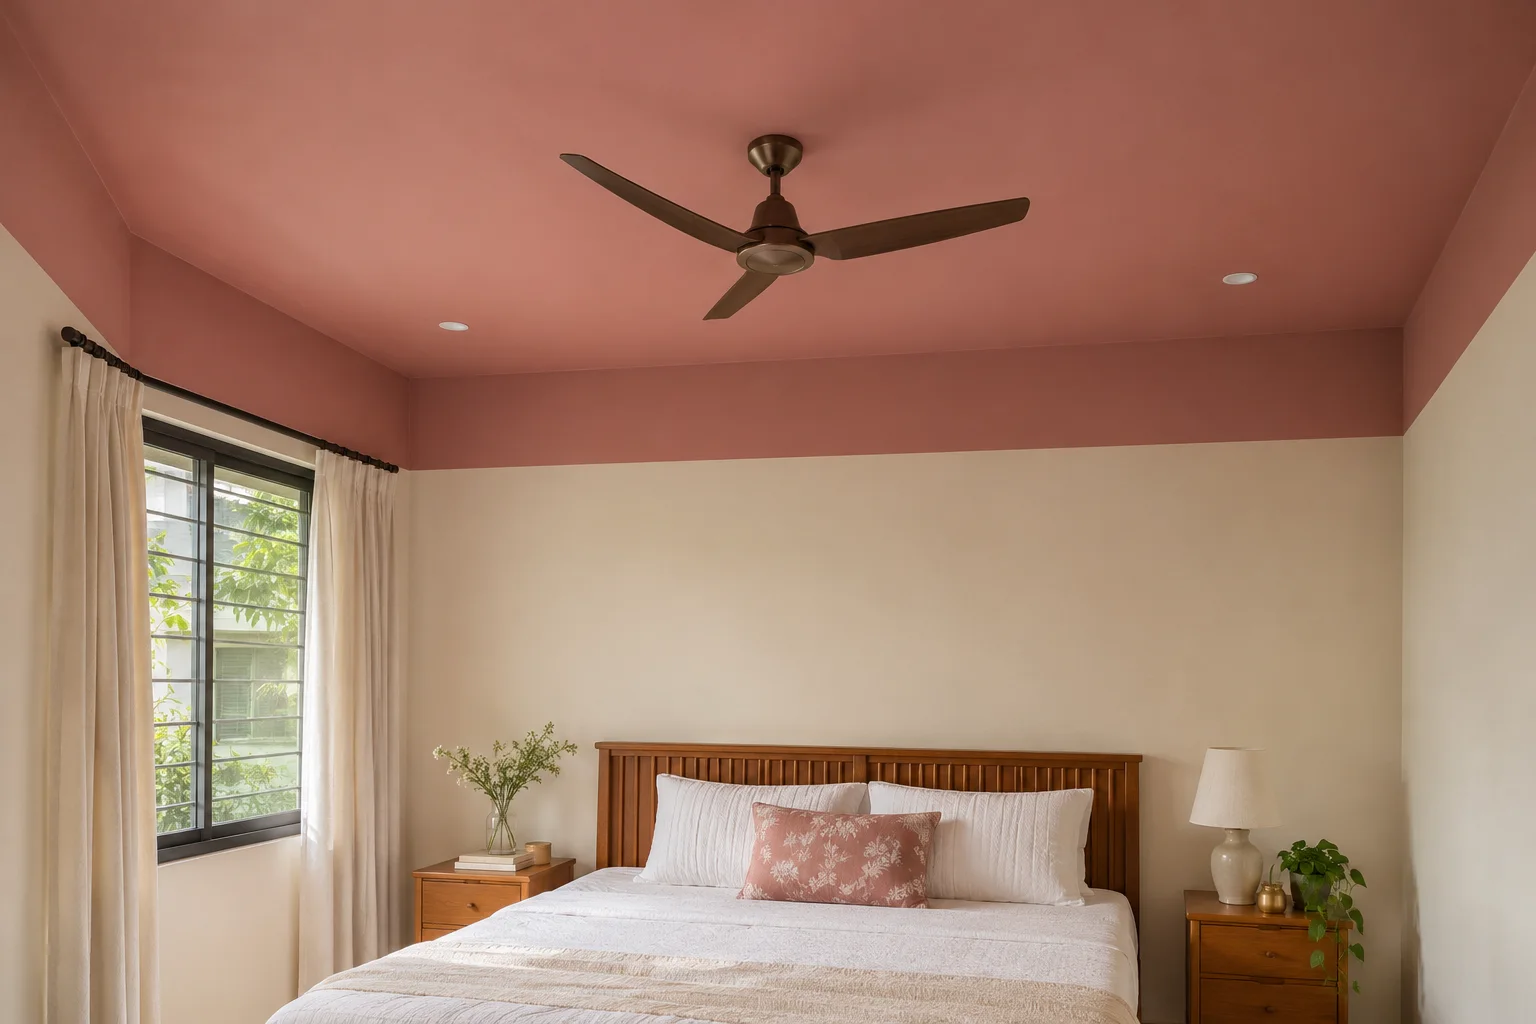
| Clay pink | Cream or warm neutral | Warm wood and simple textiles | Does it become stronger than expected overhead? |
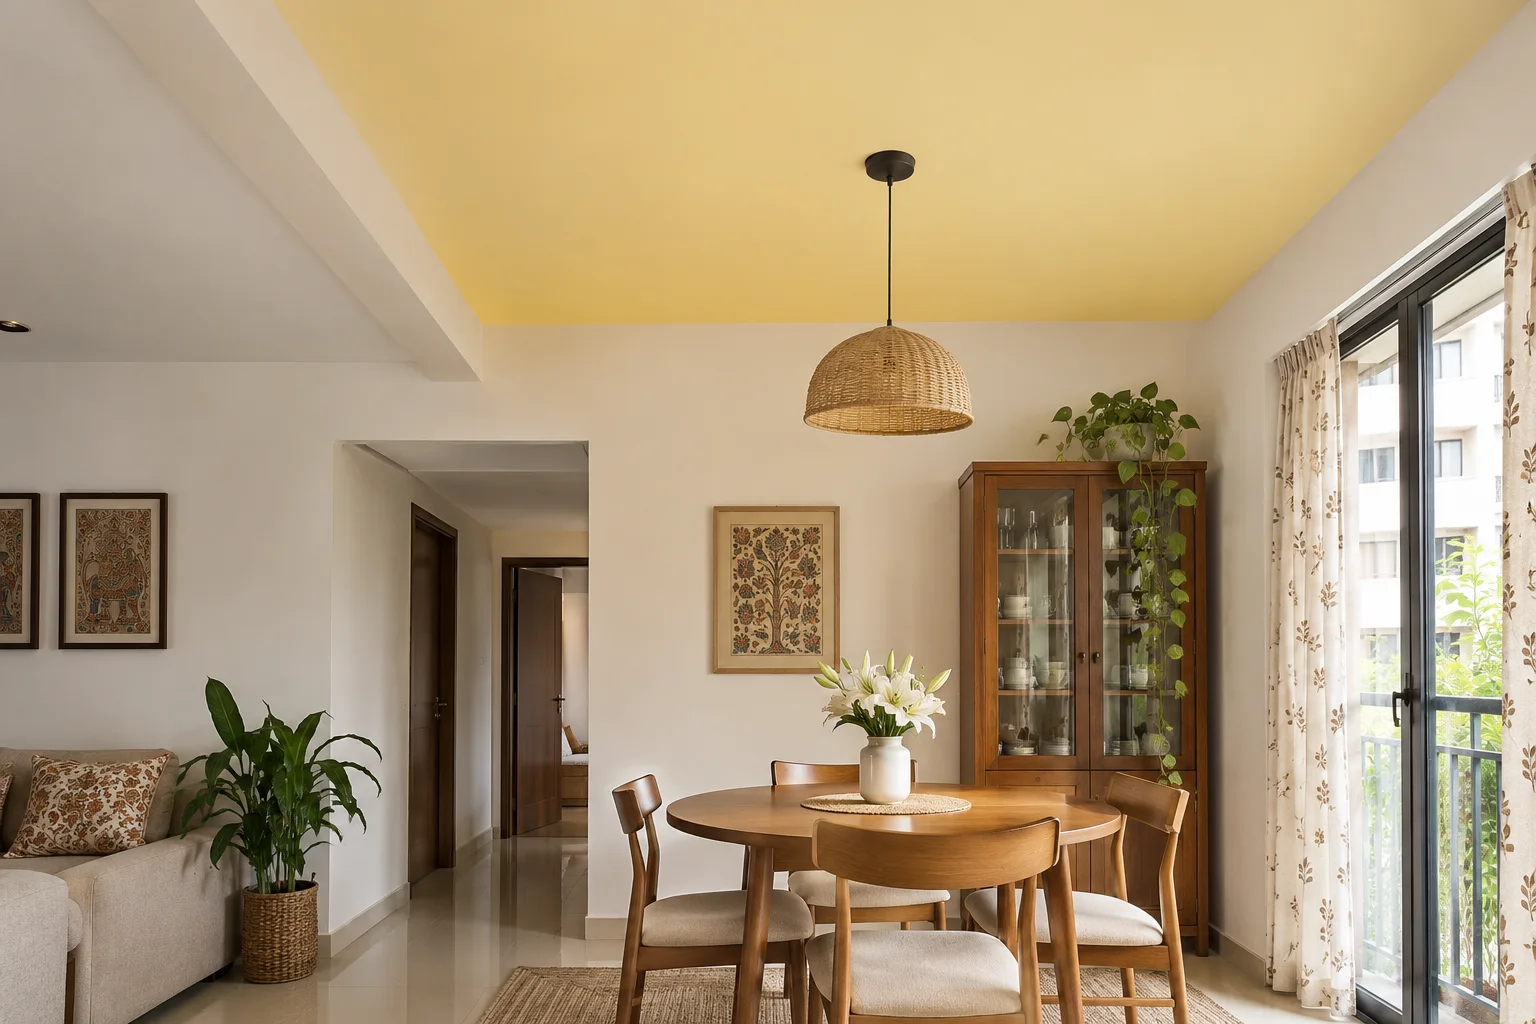
| Soft ochre or butter yellow | Gentle warm white | Oak, earthy fabrics, restrained metal accents | Does the room become overly yellow? |
| Warm greige | A compatible light neutral | Mixed timber and neutral furniture | Are the undertones compatible? |
| Deep muted blue or green | An intentionally lighter wall | A room where a stronger overhead presence is wanted | Is the contrast comfortable from the main seats? |
Compare two or three candidates rather than collecting many unrelated swatches. Keep the retained furniture visible during the test. If the floor is strongly coloured, first check the ceiling sample against it; adding matching cushions cannot resolve every undertone clash.
How to adapt the idea room by room
Living room: work with the main view
Look from the entrance, sofa and balcony side. Choose whether the ceiling should be a quiet background or a visible feature. With a television wall, assess reflections and the overall contrast during normal viewing. Keep existing wood and seating in the sample composition instead of planning a ceiling colour that only works after replacing the room’s furniture.
Bedroom: check the view from the bed
The ceiling occupies a different part of the view when you lie down. Test the colour and boundary from that position, with bedside lights on. A short band can connect the ceiling to a headboard composition, but it should not accidentally cut through the wardrobe or curtain arrangement. Decide whether the wardrobe fronts remain unchanged before finalising the line.
Dining area: use an existing ceiling division
In an open living-dining room, an existing beam or ceiling step can define the dining colour. Review the transition from several directions. An arbitrary painted rectangle overhead may feel disconnected if it does not align with the room or table. If a painted zone is intended to follow the table, confirm its final location before setting out the ceiling or pendant position.
Children’s room, kitchen and bathroom
For a child’s room, make the cap work with furniture and bedding that may change. In kitchens and bathrooms, exposure, ventilation, cleaning and the coating system need their own assessment. Do not select an ordinary ceiling product solely for its shade. Ask the supplier to confirm suitability for the actual surface and conditions; a colour treatment does not resolve condensation, leaks or unsuitable ventilation.
Will a coloured ceiling make a small or low room feel smaller?
It can change the perceived proportions, but there is no single result for every room. Contrast, brightness, daylight, furniture and the depth of the band all contribute. Colour does not change the physical ceiling height. Avoid both promises that it always makes a room taller and rules that every dark ceiling makes a room unusable.
If you want a restrained starting point, compare a lighter muted ceiling, a wall-adjacent shade and a ceiling-only treatment before a strong dark cap. Review the view from the main occupied positions. If a deep band draws attention to a low junction you dislike, shorten the band or stop at the ceiling instead. You do not need to repaint every wall to test a less assertive option.
What about beams, cornices, fans and false ceilings?
Treat each visible plane as a decision. A shallow beam may read more continuously when its sides and underside share the ceiling colour, while a contrasting beam deliberately emphasises its form. Neither is automatic. Mark the chosen surfaces on photographs so “paint the ceiling” does not leave unexpected white strips or partly coloured edges.
A cornice can stay separate or join the cap, depending on the finish system and intended outline. Decide whether the boundary follows its lower edge or a separate line. Review coves, curtain pockets and access panels as well. Keep panels operable and have the appropriate installer handle fixtures where necessary. Painting fan blades, light fittings, detectors, vents or electrical components is not included by default.
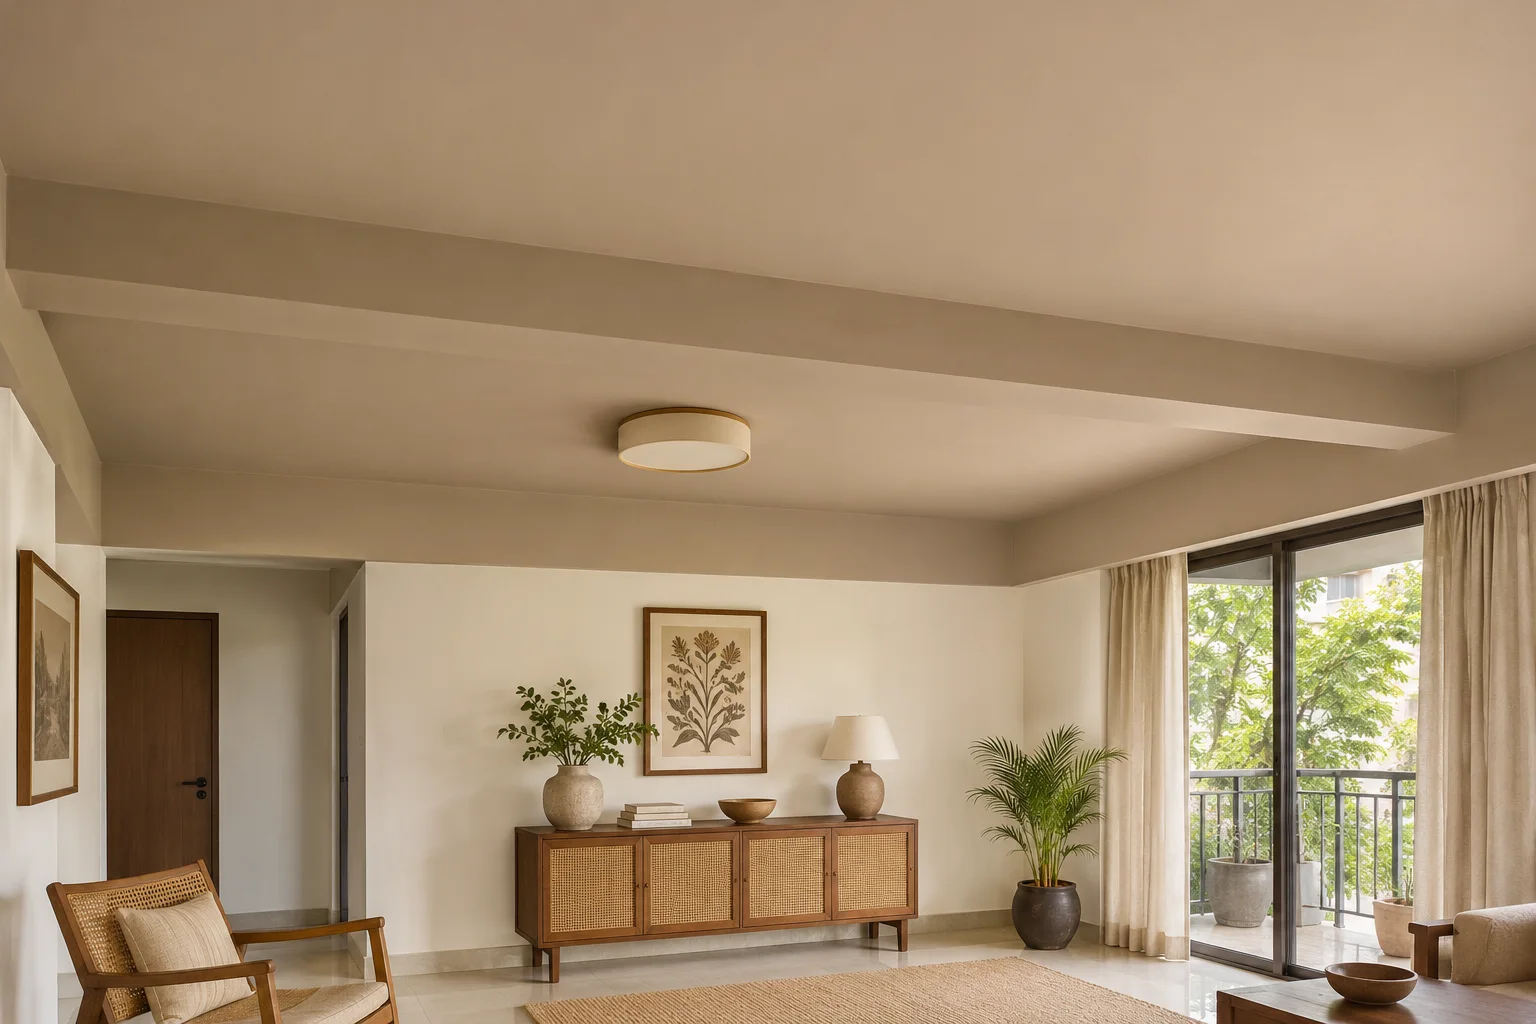
You do not need a new false ceiling just to add colour. Existing sound painted plaster or another suitable ceiling can be assessed for repainting. If you are also changing services or ceiling construction, coordinate that work first. Our flat-ceiling versus false-ceiling guide helps separate that larger decision from a paint refresh.
How should you test colour and lighting?
See a large physical sample in the ceiling position, using the selected coating system or a sample method agreed with the supplier. A small vertical paint card is useful for shortlisting, but it does not reproduce a whole overhead surface. Compare morning, later daylight and the normal evening setting. Keep the existing lamps you intend to retain on during the test.
Ask a painter to arrange overhead sampling safely rather than holding a loose board above a seated person or balancing on furniture. If a sample is prepared on another material, confirm that it is suitable for judging the final system. Record the approved product, colour reference and finish; a photograph alone is not a colour approval.
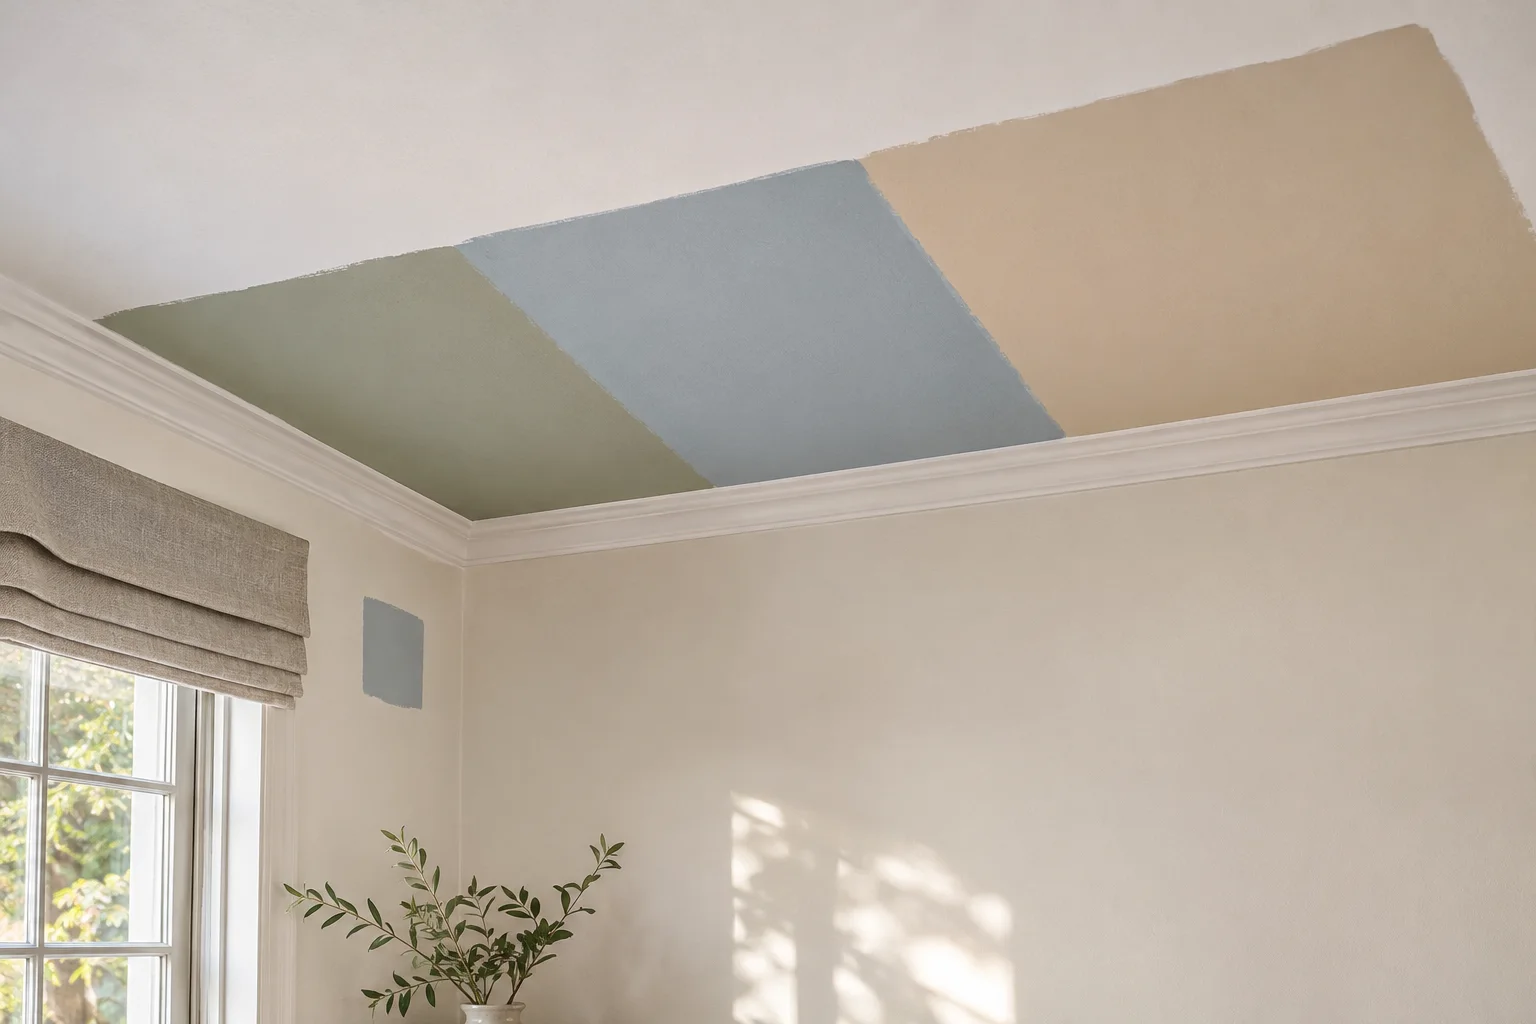
A change in lamp or finish can alter the appearance of the same shade. Assess reflected light on nearby upper walls and any cove-light effect before choosing. See why light changes paint colour for a fuller sampling approach.
Which paint finish should you choose?
A flat or low-sheen ceiling finish is a common starting point where you want less reflected light. Benjamin Moore’s ceiling guidance describes an ultra-flat option; that is an example of a product category, not a requirement to buy that brand. Product names such as flat, matt and matte are not identical specifications across manufacturers. Compare the actual finish and suitability locally.
Higher sheen creates a different reflective effect and makes surface preparation particularly visible. Choose it deliberately after a sample, not as a universal upgrade. Where the cap continues onto a wall, confirm that the selected product is suitable for both surfaces or specify compatible products separately. The same colour reference in two finishes can still look different; approve their junction in the room.
A practical preparation and painting sequence
- Confirm scope. Mark the ceiling, any band and included details on photographs. Agree the colour, finish and exclusions.
- Assess the surface. Have flaking, staining, cracks or dampness investigated appropriately. Resolve causes before decorative repainting; agree repairs and compatible preparation.
- Protect the room. Plan furniture movement, floor and wall protection, safe access and any fixture work with the responsible team.
- Approve the sample. View the actual colour and finish under the room’s usual lighting and sign off the boundary.
- Prepare and apply. Follow the selected product’s preparation, primer, application and recoat guidance. Agree who sets out the edge and checks it.
- Inspect after the stated drying period. Review colour, coverage, junctions and included details in daylight and normal room lighting.
- Close the job. Check cleaning and any reinstated fittings, and retain the product references, care guidance and agreed touch-up information.
Benjamin Moore’s application guide describes protecting retained walls, cutting in at the perimeter and following label drying times. Asian Paints’ painting guide also highlights preparation and finish inspection. Use the instructions for the actual products supplied; do not substitute a universal primer, dilution, coat count or drying interval.
How much painting is involved, and how should you budget?
Measure the actual surfaces. A ceiling-only refresh covers less wall area than full-room painting, but masking, access, preparation and careful edge work still cost time. A band adds perimeter work and may require touching up a retained wall. A lower painted area does not automatically mean a proportionally lower labour bill.
Worked area example—not a room-size recommendation
Suppose a rectangular room measures 4 m by 3 m and the chosen band is 0.2 m deep. The flat ceiling area is 4 × 3 = 12 m². The perimeter is 2 × (4 + 3) = 14 m, so the gross band area is 14 × 0.2 = 2.8 m². The combined gross area is 14.8 m². Measure beams, coves, openings and excluded surfaces separately as relevant.
For an illustrative product calculation only, if a coating were specified at 10 m² per litre per coat and two coats were required, 14.8 × 2 ÷ 10 gives 2.96 litres before any agreed allowances. That coverage and coat count are assumptions for the arithmetic, not a recommendation for your paint. Use the selected product’s stated coverage, preparation needs and the painter’s measured allowance; primer and repairs are separate.
Build a clear quotation
| Quote line | Ask the painter to identify |
|---|---|
| Preparation and repairs | Existing condition, repair boundaries and compatible preparation |
| Paint system | Brand, product, colour reference, finish and required application |
| Measured work | Ceiling, band, beams, cornices and any exclusions |
| Edge and protection work | Setting out, masking, retained walls, floors and furniture |
| Access and fittings | Suitable access arrangements and responsible fixture handling |
| Completion | Cleaning, inspection, touch-ups, taxes where applicable and payment scope |
As a spending exercise, a ₹15,000 envelope could hold ₹6,000 for preparation and labour, ₹4,000 for the selected coating system, ₹2,000 for protection and edge work, ₹1,000 for samples and ₹2,000 uncommitted. These are illustrative allocations, not a market estimate or a promise that the project fits that total. Obtain site-specific quotations, and separate damp repair, ceiling reconstruction or electrical changes.
How long should you allow?
Separate colour selection from application. Set aside more than one lighting condition for sample review, then let the contractor schedule protection, repairs, preparation, painting and inspection. Dry-to-touch, recoat and full-care times are different product requirements. Do not assume the room is ready for normal use or cleaning merely because a coat feels dry. Ask for the relevant product guidance and conditions before accepting a completion date.
Common mistakes and how to avoid them
| Mistake | Better decision |
|---|---|
| Choosing colour from a phone image | Approve a large physical sample in the room |
| Leaving the stopping line vague | Mark all walls and corners before painting |
| Adding a deep band without checking tall furniture | View it beside wardrobes, windows and curtains |
| Changing bulbs after sample approval | Test the normal lighting you intend to keep |
| Using paint to conceal dampness or failing plaster | Resolve the condition before the decorative finish |
| Assuming the same shade looks identical in every finish | Approve the actual product-and-finish combination |
| Counting only ceiling paint in the budget | Include preparation, access, protection and edge work |
A brief you can give your designer or painter
“Retain the lower walls and existing furniture. Compare ceiling-only colour with a short matching wall band. Show the boundary across every corner, beam and curtain detail. Provide a large sample in the proposed finish, confirm surface preparation, and quote the ceiling, band, protection, fittings and touch-ups separately. Agree the product references and completion checks before starting.” Add room measurements, photographs and any owner permissions relevant to the property.
Use WallsToWonder Design My Room to explore visual direction with your existing furniture. Keep physical sampling as the colour approval. For a wider refresh, use the interior cost planning tool to organise work categories and the quotation checker to prepare questions about unclear inclusions. Final product and site decisions belong in the agreed scope.
Frequently asked questions
Is colour capping the same as painting the ceiling?
Ceiling-only colour is one possible overhead treatment. A capped scheme may also extend down a short upper-wall band. Agree the surfaces and boundary explicitly, because the term alone is not a specification.
Do I need to repaint the lower walls?
Not necessarily if their condition, colour and protection permit them to remain. Ask how edge work, sample patches or accidental marks will be addressed; retained walls may still need agreed local making good.
How far should the colour come down the wall?
There is no universal depth. Compare a mock-up against room proportions, windows, wardrobes, curtains and the view from the main seat, then record the accepted boundary.
Can this work with a low ceiling?
It may, but judge the actual room. Begin by comparing a lighter, lower-contrast or ceiling-only option before a deep dark cap. The treatment changes appearance, not physical height.
Which colour is best with wooden furniture?
Compare muted blue, sage, clay, warm neutral or ochre candidates against the actual timber and floor. The undertones and lighting matter more than choosing a fashionable colour name.
Can the ceiling be darker than the walls?
Yes, as a deliberate design choice. Test its contrast from the occupied positions and under normal evening lights rather than assuming a darker ceiling always has the same effect.
Should beams and cornices match the ceiling?
They can match or contrast. Show each plane on the scope drawing so the painter knows what to include, and check the resulting outline across the whole room.
Do I need a false ceiling?
No. A suitable existing ceiling can be assessed for repainting. Structural, service or false-ceiling alterations are separate decisions and should not be assumed necessary for colour alone.
Can regular wall paint be used overhead?
Only if the selected product is suitable for that substrate and use. Ask the supplier or painter to confirm the system rather than relying on the generic label wall paint.
Is matt always the right finish?
No. Low sheen is a common starting point, but the chosen effect, surface condition and product suitability decide. Sample the finish as well as the colour.
Will this cool the room or improve sound insulation?
Do not treat a decorative colour scheme as thermal or acoustic treatment. Those performance goals need their own assessment and suitable systems.
Can I do it in a rented home?
Discuss the exact surfaces and any reinstatement requirements with the owner before commissioning work. Keep the agreement and approved shade references with the project record.
How can I avoid a patchy ceiling?
Agree suitable surface preparation, products, tools and application with the painter, following manufacturer instructions. Inspect after the stated drying period rather than judging wet paint.
Can a painted cap hide ceiling cracks or leaks?
No. Investigate the cause and agree the appropriate repair before decorative painting. A colour finish should not be used as evidence that the underlying condition is resolved.
Can it be changed back later?
It can usually be considered for repainting, but preparation, primer and coverage depend on the existing system and new choice. Reversal involves another painting job, not simply removing a decorative layer.
What should I keep after completion?
Keep product and colour references, finish details, invoices, care guidance, the approved scope and any agreed leftover paint stored according to its instructions.
References
Benjamin Moore: ceiling painting, finish and application guidance. Confirm the instructions for the actual locally supplied product.
Asian Paints: planning, preparation and inspection for painting work.
Turn this idea into a plan for your home
Visualise your space, understand the likely budget, or find a professional who can bring the idea to life.