

Why Ground-Floor Flats Get Damp and What Helps
Damp patches near the skirting, peeling paint, a persistent musty smell or water appearing on the basement floor can be signs of a moisture problem that needs more than a fresh coat of paint.
In Indian homes, basement and ground-floor dampness can have several causes. Rainwater may enter through cracks or poorly protected below-ground walls, groundwater may put pressure on the structure, plumbing may be leaking, or moisture may travel upwards through masonry. In some cases, condensation can look similar to water ingress.
The important first step is to understand where the moisture is coming from. Waterproofing the wrong surface—or covering the symptoms without correcting the cause—can leave the problem unresolved.
Here is a practical guide to identifying the likely source of dampness, understanding the available waterproofing approaches and planning repairs before the damage spreads.
1. Understand Why Basements and Ground-Floor Flats Get Damp
Basements and ground-floor flats face different moisture challenges, even though the visible symptoms can look similar.
A basement wall may be in contact with soil that becomes saturated during heavy rainfall. Water can enter through cracks, construction joints or vulnerable connections between the wall and floor. Where groundwater pressure builds up, water may be forced through weak points in the structure.
In a ground-floor flat, moisture may come from rising damp, rainwater collecting beside an external wall, a leaking water supply or drainage pipe, or water entering from a bathroom, balcony or adjoining area. External ground levels raised above the original damp-proofing arrangement can also contribute to moisture reaching the walls.
Condensation is another possibility, especially in poorly ventilated rooms with cool surfaces and humid air. It can create damp-looking patches even when the building envelope is not leaking.
These causes require different responses. A surface coating alone cannot correct defective drainage, repair a plumbing leak or resolve every form of moisture movement.
2. Look for Warning Signs Before Choosing a Treatment
Start by examining the affected room and recording what you see.
Look for:
- Damp patches concentrated near the bottom of walls or skirting boards.
- Paint that bubbles, flakes or separates from the plaster.
- White powdery deposits on masonry or plaster.
- Musty smells or recurring mould growth.
- Water staining around windows, pipes, corners or wall-floor joints.
- Puddles, damp floor edges or seepage that appears after rain.
- Similar patches that keep returning after repainting.
Notice when the problem becomes worse. Does it appear mainly during the monsoon? Does it become more noticeable after a bathroom or kitchen is used? Is it present throughout the year, or mainly in a room that remains closed?
These patterns can help a professional narrow down the likely cause, but they do not prove it on their own. For example, white deposits can indicate moisture moving through masonry, while mould can be associated with condensation or water ingress.
Take photographs and note when the patches appear. If the affected area is growing, plaster is deteriorating or water is actively entering, arrange an assessment rather than waiting for the next painting cycle.
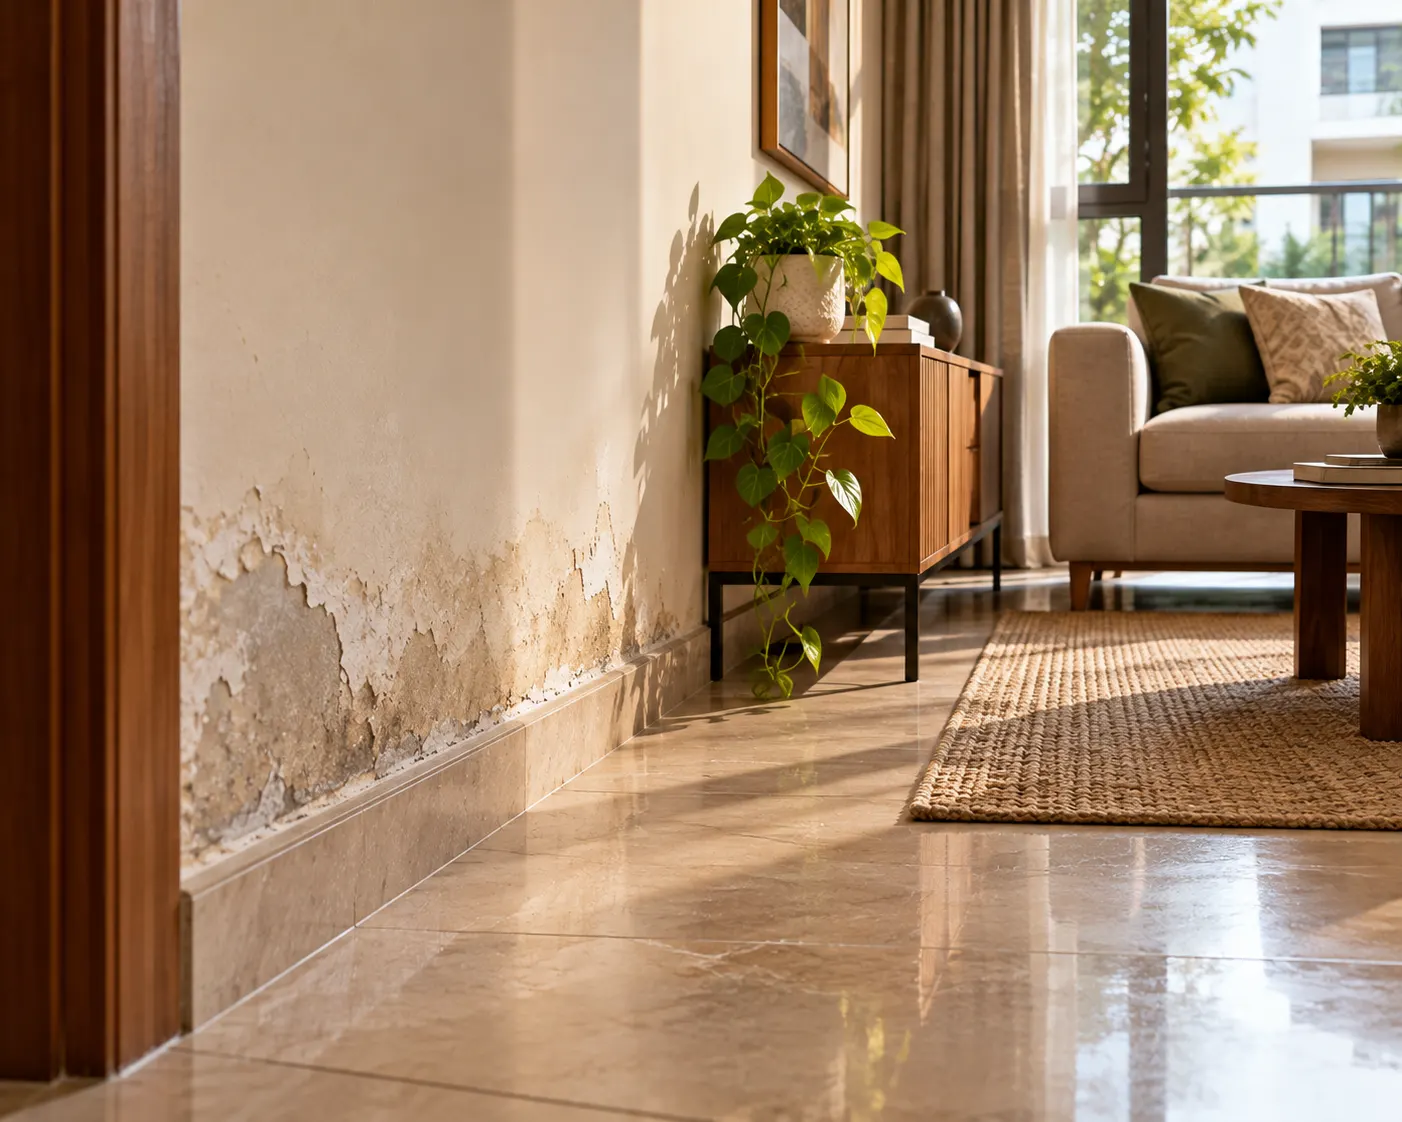
3. Trace the Source of Water Before Repairing the Wall
Before selecting a waterproofing product, investigate the routes through which moisture could be entering.
For a basement, check the visible condition of walls, cracks, construction joints, the wall-floor junction and any pipe penetrations. Observe whether seepage appears after rainfall and whether water collects around the building or near basement entrances.
For a ground-floor flat, inspect accessible plumbing connections, bathroom and kitchen walls, balcony edges, nearby rainwater pipes and the outside ground level. Water may be entering from an adjacent property or a shared building element, so the source is not always within the affected room itself.
Also consider condensation. Persistent humidity, poor ventilation and cool wall surfaces can create damp patches or mould. A professional may need to distinguish this from water passing through the building structure.
Do not seal every crack or coat every damp wall without understanding the underlying problem. The correct response depends on the source, the condition of the substrate and the building's construction.
If water is actively entering, a crack is widening or the structure appears damaged, seek an appropriate building or waterproofing professional. If water is near electrical outlets, wiring or distribution boards, keep clear of the affected area and arrange qualified assistance.
4. Understand the Main Waterproofing Approaches
Waterproofing is not one universal product or process. The right method depends on where the water comes from, how the structure is built and whether the affected area can be accessed from outside.
For below-ground basement walls, an external waterproofing system may be considered where excavation and access are feasible. Such systems can include a suitable membrane, carefully detailed joints and protection or drainage layers designed for the site conditions.
When the outside of an existing basement cannot reasonably be accessed, a specialist may assess an internal-side waterproofing system. These approaches have different capabilities and limitations. The choice must account for water pressure, the condition of the masonry or concrete, and how moisture will be managed.
For ground-floor walls, the required work may be different. A rising-damp issue, leaking pipe or high external ground level should not automatically be treated as a basement membrane problem. The source may need repair, levels may need correction, or a specific system may be required for the affected masonry.
The wall-floor junction, construction joints, cracks and pipe penetrations deserve particular attention because the waterproofing system must remain continuous around these details.
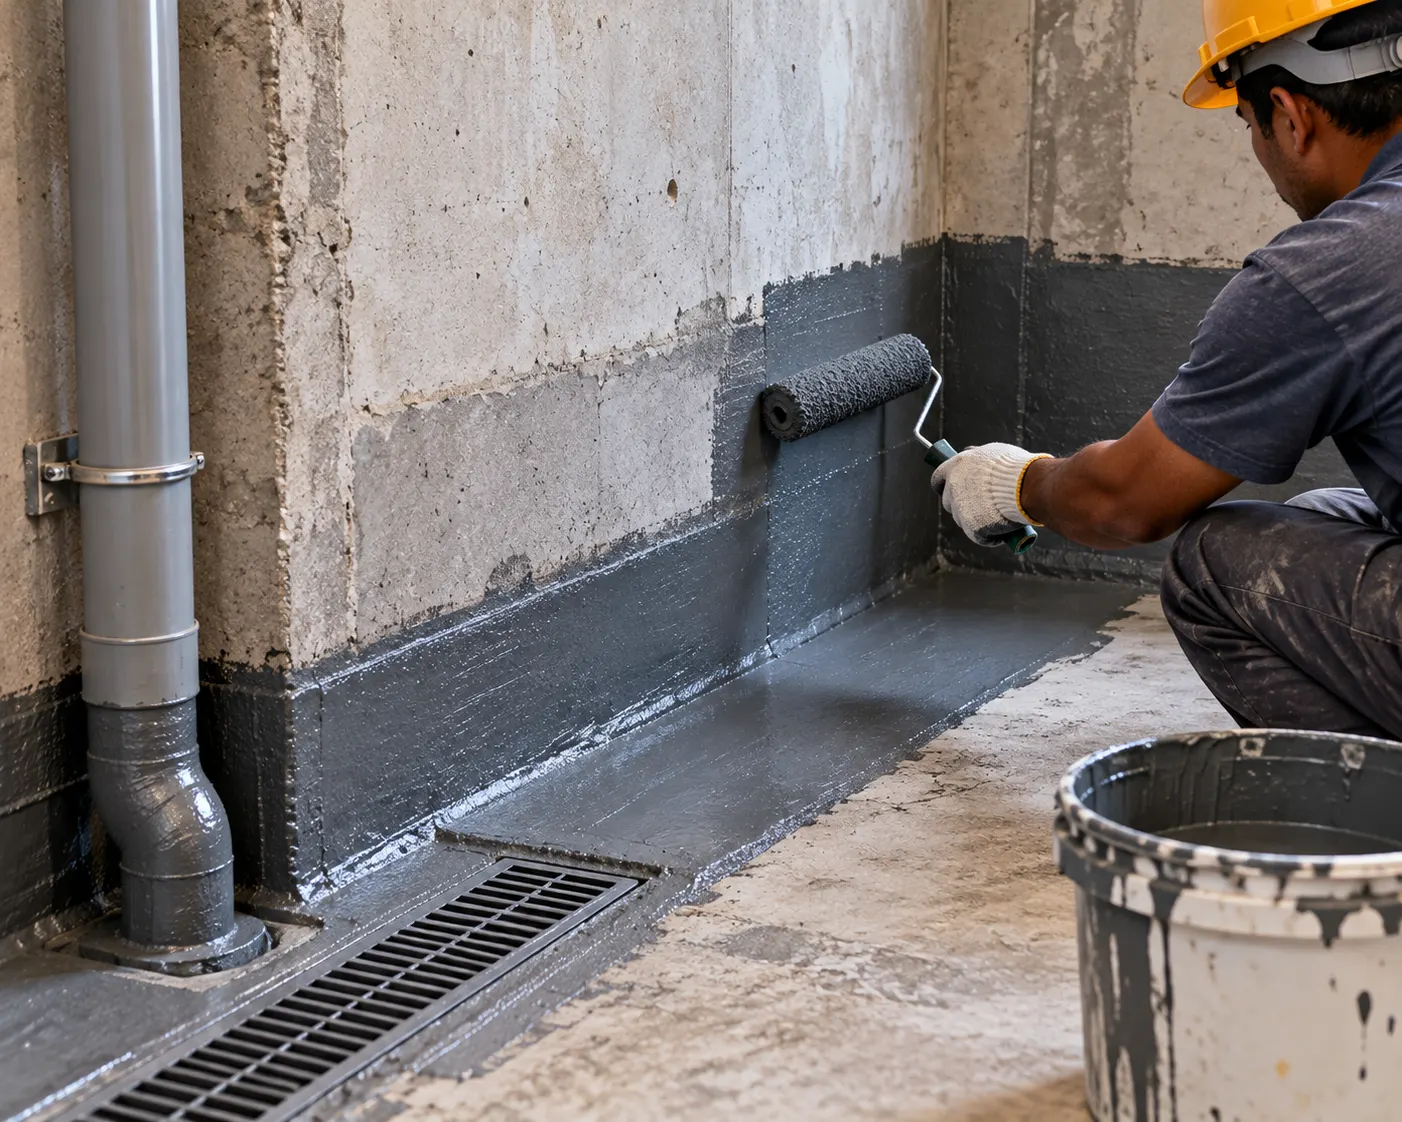
Ask the contractor to explain why the proposed method is suitable for your particular building. A product name alone does not explain how the water source will be controlled.
5. Do Not Overlook Drainage and External Ground Levels
Waterproofing works best when water is also managed appropriately around the building.
Check whether rainwater is discharged away from the walls or whether downpipes empty into areas where water collects. Look for blocked surface drains, poorly sloped paving, low spots near basement entrances and soil or planters that keep external walls wet.
In a basement, a suitable drainage arrangement may form part of the solution, depending on site conditions. A perimeter drain, drainage layer or sump-and-pump arrangement should be designed for the building's water conditions rather than installed as a generic add-on.
Where a sump pump is required, its capacity, discharge route, maintenance and backup arrangements matter. Pumping water away without considering where it goes can simply redirect the problem.
For a ground-floor flat, external paving or soil that sits too high against a wall can allow moisture to bridge a protective damp-proofing detail. Where this is suspected, the ground levels and relevant construction details should be assessed before finishes are repaired.
Do not block existing drainage openings or cover inspection points as part of a cosmetic renovation. They may be important to the building's water-management strategy.
6. Prepare the Surface Properly Before Applying Waterproofing
A waterproofing system depends on the condition of the surface beneath it.
Loose plaster, flaking paint, dust, salts and material that has deteriorated through repeated dampness may prevent a repair product from bonding as intended. The affected area needs to be inspected and prepared according to the selected system's requirements.
Some repairs may involve removing unsound finishes, treating cracks or joints with an appropriate system, repairing damaged concrete or masonry, and allowing the substrate to reach the required condition before further work. The precise sequence varies with the material and the cause of the problem.
Do not assume that a waterproofing coating can safely be applied directly over damp paint or deteriorated plaster. Equally, do not apply an internal finish simply to conceal a wall that is still receiving water.
The contractor should explain how the water source will be addressed, what surface preparation is required, how joints and penetrations will be treated and what conditions must be met before the finished surface is reinstated.
7. Choose a Waterproofing Professional Based on the Diagnosis
A quotation should explain more than the product and the area to be coated.
Ask the contractor to document the suspected source of water, the proposed remedy, the areas included and excluded, the preparation process and how vulnerable details such as joints and pipe openings will be treated.
Clarify which materials and application stages are included, the required curing or drying periods, and how the completed work will be inspected. Where appropriate to the system and site, discuss how its performance will be checked before plaster, flooring or other finishes conceal the work.
Also review the warranty carefully. Find out what it covers, how long it applies, what conditions may invalidate it and whether it covers only the applied material or the performance of the complete system. Ask who is responsible if the moisture source turns out to be outside the quoted scope.
Compare quotations by their diagnosis, method and scope rather than choosing only the lowest amount. Two proposals that use similar product names can involve very different levels of preparation and detailing.
8. Avoid Common Waterproofing Mistakes
Several shortcuts can leave moisture problems unresolved:
- Painting over damp patches without investigating the source.
- Applying an internal coating when the real problem is a plumbing leak or exterior drainage.
- Sealing visible cracks without checking whether they are active or linked to a larger defect.
- Ignoring the wall-floor junction and pipe penetrations.
- Applying products over loose finishes or unsuitable surfaces.
- Covering repairs with plaster or flooring before the system is ready.
- Assuming a warranty guarantees success without reading its exclusions.
Waterproofing is a system, not just a coating. Its performance depends on suitable materials, correct preparation, detailing, drainage where required and the underlying building conditions.
If the first repair has not worked, reassess the diagnosis instead of automatically adding another layer of product.
A Practical Waterproofing Checklist
Before approving the work, confirm that you have:
- Recorded the visible signs and when the dampness appears.
- Investigated likely sources, including plumbing, rainwater, condensation and below-ground water ingress.
- Obtained an assessment appropriate to the building and the severity of the problem.
- Confirmed why the proposed waterproofing method suits the identified cause.
- Included the wall-floor junction, cracks, joints and penetrations where relevant.
- Addressed drainage and external ground levels where they contribute to the problem.
- Agreed on surface preparation, application stages and drying or curing requirements.
- Clarified the contractor's scope, exclusions, inspection process and warranty.
- Checked for electrical or other safety concerns before work begins.
- Planned reinstatement of plaster, paint and flooring only after the repair is ready.
The goal is not to choose the most elaborate waterproofing system. It is to identify the cause and specify a repair that suits the building.
Plan Your Home Improvements With Walls to Wonder
Moisture repairs should be dealt with before repainting, installing new flooring or planning a basement renovation. Once the source has been addressed, you can plan the room's finishes and layout with a clearer understanding of what the space needs.
Explore the Walls to Wonder Interior Design Cost Estimator to organise a broader interiors budget, or browse interior designers on Walls to Wonder when planning the next stage of your home project.
Design planning can help organise the space and finishes, but diagnosing water ingress and specifying structural waterproofing require an appropriate on-site professional.
Final Thought
Persistent dampness is a symptom, not a diagnosis. The right solution for a basement experiencing water pressure may be very different from the treatment required for a ground-floor wall affected by a leaking pipe, rising moisture or condensation.
Identify the source first, assess drainage and vulnerable joints, choose a suitable system and agree on the repair scope before rebuilding the finishes.
A dry, durable space begins with understanding where the water is coming from—not simply covering the mark it leaves behind.
Frequently Asked Questions
1. Why does a ground-floor flat develop damp walls?
Possible causes include rising moisture through masonry, leaking pipes, rainwater entering from outside, poor drainage, high external ground levels and condensation. The pattern of dampness can offer clues, but the source should be assessed before selecting a treatment.
2. Can basement waterproofing be done from the inside?
Sometimes. An internal-side system may be appropriate where external access is limited, but its suitability depends on the source of water, the building construction and the system's limitations. A specialist should assess whether internal treatment will manage the actual moisture problem.
3. Is waterproof paint enough to stop dampness?
Not necessarily. A coating may be part of a suitable system, but paint alone does not repair a leaking pipe, correct poor drainage or resolve every form of water ingress. Identify and address the underlying cause first.
4. Should damp plaster be repaired immediately?
Loose or deteriorating plaster should be assessed, but cosmetic reinstatement should generally wait until the moisture source has been addressed and the surface is suitable for repair. The appropriate drying and preparation requirements depend on the material and the selected system.
5. Does every basement need a sump pump?
No. The need for a sump pump depends on the site's water conditions, drainage design and the building's waterproofing strategy. Where one is required, it should be properly sized, discharged appropriately and maintained.
6. When should I call a waterproofing professional?
Arrange an assessment if dampness keeps returning, water enters during rainfall, a basement floor becomes wet, plaster deteriorates repeatedly or the source is uncertain. Active leakage, structural cracking or water near electrical installations may require urgent specialist attention.
Turn this idea into a plan for your home
Visualise your space, understand the likely budget, or find a professional who can bring the idea to life.