
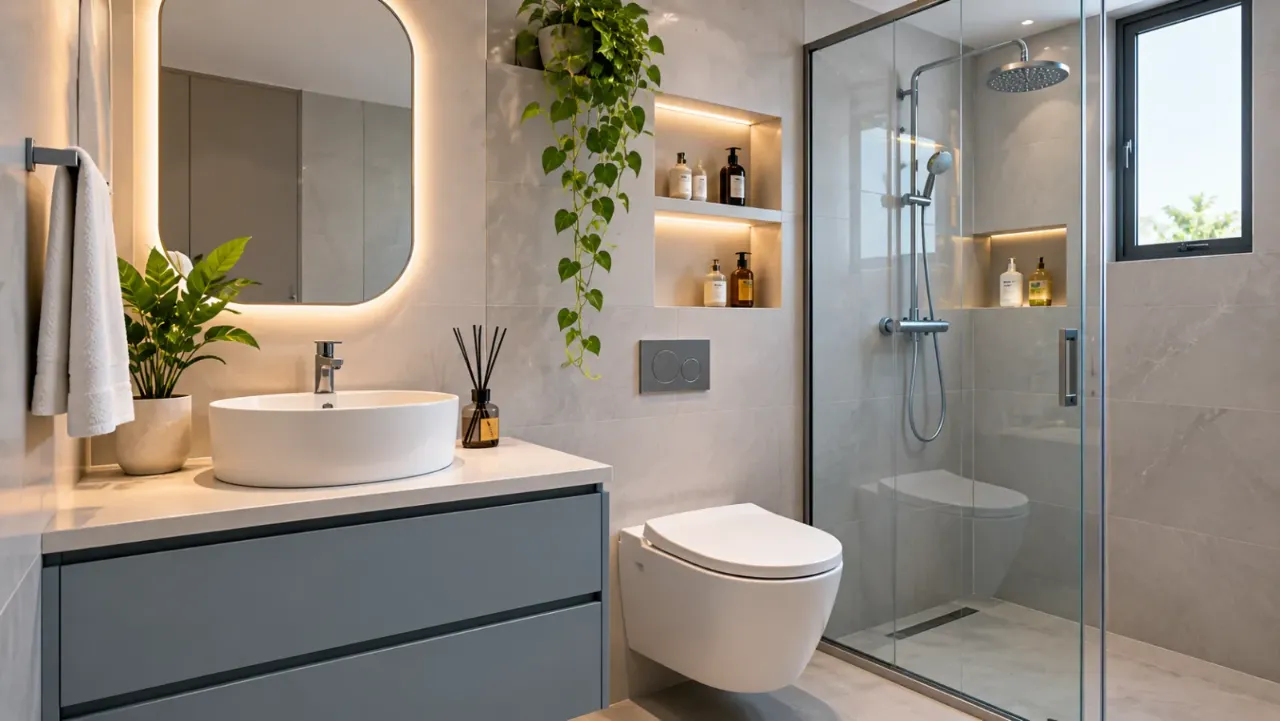
Small Bathroom Design: Layout Tricks That Improve Usability
A small bathroom does not necessarily need fewer features. It needs a layout in which every fixture has a clear purpose and enough room to be used comfortably. When the door blocks the vanity, the shower occupies the main walking area or storage projects into the room, even a well-finished bathroom can feel inconvenient.
The key is to plan the layout before choosing tiles, fittings or decorative details. The position of the entrance, toilet, basin and shower determines how easily people can move through the space. A few thoughtful decisions can make a compact bathroom feel more organised without requiring a larger floor area.
1. Start With the Bathroom's Actual Measurements
Before selecting fixtures, measure the bathroom carefully. Note the length and width, ceiling height, entrance position, window, plumbing points and any structural projections.
Do not plan only around the available floor area. Check how much usable space remains after the door opens and the fixtures are installed.
- Door opening: Identify whether the door swings into the bathroom and whether it obstructs the basin, toilet or shower.
- Plumbing points: Check the existing water supply, waste pipes and drainage positions before deciding to relocate fixtures.
- Wall projections: Account for columns, ducts, ledges and concealed plumbing that may affect usable space.
- Movement: Leave enough room to enter, turn, stand at the basin and use the toilet comfortably.
- Fixture dimensions: Check the actual product dimensions rather than relying on appearance in a catalogue.
A measured floor plan is a better starting point than choosing fittings individually and trying to fit them together later.
2. Choose a Door That Does Not Waste Valuable Space
A conventional inward-opening door can take up a surprising amount of usable floor area. In a narrow bathroom, its swing may interfere with the basin or toilet.
- Outward-opening door: Keeps the internal floor area clear, provided the corridor or adjoining space allows it safely.
- Sliding door: Avoids the door-swing area, but needs suitable wall space and an appropriate track or pocket arrangement.
- Pocket door: Slides into a wall cavity and gives a clean, space-saving result, but requires suitable wall construction and planning.
The right choice depends on the wall layout, privacy, accessibility and available space outside the bathroom. Check the door opening and hardware before finalising the plan.
3. Place Fixtures Along the Most Efficient Wall
In a compact bathroom, the position of each fixture matters as much as its size. Grouping the basin, toilet and shower along suitable walls can make plumbing easier to manage and reduce unnecessary movement through the room.
- Linear layout: Fixtures are arranged along one wall. This can work well in long, narrow bathrooms.
- Opposite-wall layout: Fixtures are placed on two facing walls, leaving a central passage. It needs sufficient width to avoid a cramped walkway.
- Corner shower layout: The shower occupies a corner, helping keep the remaining floor area available for the basin and toilet.
- End-wall shower layout: The shower is placed at the far end of a narrow bathroom, creating a more organised sequence from entrance to shower.
There is no single layout that works for every bathroom. The best arrangement depends on the room's proportions, door location, plumbing and the clearances required around each fitting.
4. Select a Shower Arrangement That Fits the Room
A shower area should be large enough for comfortable use without dominating the entire bathroom.
- Fixed glass panel: Creates a visual boundary while keeping the bathroom relatively open. It works best when the shower spray and floor slope are planned correctly.
- Sliding glass enclosure: Avoids the swing space required by a hinged shower door, although the track and panels need regular cleaning.
- Shower curtain: Offers flexibility and can be useful in very compact bathrooms, provided it is fitted to control splashing.
- Open shower area: Can make the room appear more spacious, but needs careful planning of drainage, slope and splash control.
Avoid choosing a shower enclosure based only on its appearance. Check the door or panel movement, access, cleaning requirements and how water will be contained.
5. Use a Compact Vanity Without Sacrificing Usability
The vanity is one of the most frequently used elements in a bathroom. A bulky cabinet can restrict movement, but an extremely small basin may make everyday tasks uncomfortable.
- Wall-mounted vanity: Keeps the floor visible beneath the cabinet and can make cleaning easier.
- Shallow-depth vanity: Can help in narrow bathrooms, provided the basin still offers practical washing space.
- Corner basin: May suit an awkward corner where a conventional vanity would obstruct circulation.
- Integrated basin and countertop: Reduces visual breaks and can create a neat, compact arrangement.
Before buying, check the basin's depth, tap position, cabinet opening and plumbing access. Also consider whether the user can stand comfortably in front of it.
Explore Walls to Wonder's Design My Room tool to experiment with different room arrangements and design possibilities.
6. Make Use of Vertical and Recessed Storage
Storage should not interfere with movement or make the bathroom feel crowded. Instead of adding several deep cabinets, use wall space and recessed areas wherever practical.
- Recessed shower niches: Store toiletries within the wall rather than using projecting racks. Their position and waterproofing must be planned during construction.
- Mirrored cabinets: Combine mirror and storage above the basin, reducing the need for a separate cabinet.
- Slim wall shelves: Use suitable wall sections for daily essentials without occupying the floor.
- Over-toilet storage: Can make use of an otherwise underused wall, provided it does not obstruct access or feel unsafe.
- Tall, narrow cabinets: Offer storage in a small footprint, but should not block the door or circulation.
Keep frequently used products within easy reach. Avoid filling every available wall with shelves, as excessive storage can make the bathroom harder to clean and visually cluttered.
7. Keep the Floor as Clear as Possible
A clear floor improves movement and makes a compact bathroom easier to maintain.
- Consider wall-hung toilets with concealed cisterns where the wall structure and installation allow them.
- Use floating vanity units.
- Install wall-mounted towel rails and hooks.
- Choose recessed storage instead of projecting shelves.
Wall-mounted fittings require suitable structural support and planned plumbing access. Do not assume that every existing wall can support a heavy fixture.
Also pay attention to floor drainage. The floor should direct water towards the drain without creating awkward slopes or standing-water areas. Anti-slip flooring suitable for wet bathroom use is important, especially around the shower.
8. Plan Lighting and Mirrors to Improve the Experience
Good lighting makes a bathroom more comfortable to use and helps a compact room feel less enclosed.
- General lighting: Provides even illumination across the bathroom.
- Mirror lighting: Helps with grooming and daily tasks without relying on a single ceiling light.
- Shower-area lighting: Should use fittings suitable for the relevant bathroom wet-zone requirements.
A large mirror can make the room appear more open by reflecting light. A mirrored cabinet can also provide useful storage.
Avoid relying only on decorative backlighting. The basin, shower and toilet areas need practical illumination, and electrical fittings must be selected and installed according to bathroom safety requirements.
9. Choose Finishes That Support the Layout
Finishes cannot create extra floor area, but they can help the room feel more coherent.
- Use a restrained colour palette instead of introducing too many contrasting surfaces.
- Consider larger-format tiles to reduce the number of visible grout lines, while ensuring the tile is suitable for the floor and wet areas.
- Use lighter wall finishes if you want the room to feel brighter.
- Continue similar finishes across adjoining areas to reduce visual interruptions.
- Use texture selectively, especially on floors where slip resistance matters.
Do not choose glossy or polished floor tiles simply because they reflect light. Bathroom flooring must be suitable for wet conditions and safe underfoot.
10. Avoid These Common Small Bathroom Layout Mistakes
Even attractive bathrooms can become difficult to use when basic planning is overlooked.
| Common mistake | Better approach |
|---|---|
| Door hits the basin or toilet | Check the complete door swing or consider a suitable alternative. |
| Vanity is too deep | Select a compact unit that still allows comfortable basin use. |
| Shower blocks the passage | Review the shower position and enclosure opening. |
| Storage projects into the walkway | Use recessed, wall-mounted or shallow storage. |
| Toilet is too close to another fixture | Check the manufacturer's clearances and local requirements. |
| Poor drainage creates puddles | Plan floor slope and drain position before tiling. |
| Too many shelves and accessories | Keep only essential items within easy reach. |
| Lighting is limited to one ceiling point | Add suitable task lighting around the mirror and other functional areas. |
11. A Practical Small Bathroom Planning Checklist
Before approving the layout or starting renovation, review these points:
- Measure the room, entrance and wall projections.
- Mark the door opening and check for fixture conflicts.
- Confirm the location of water supply and drainage points.
- Select appropriately sized basin, toilet and shower fittings.
- Check clearances around every fixture using actual product dimensions.
- Plan the shower screen, curtain or enclosure opening.
- Include storage without narrowing the main passage.
- Decide the mirror and lighting positions.
- Confirm waterproofing, floor slope and drain placement.
- Choose flooring suitable for wet conditions.
- Check ventilation and access for future maintenance.
A useful way to test the layout is to mark the fixture footprints and door movement on a scaled floor plan before purchasing anything. You can also explore the Whole Home Visualizer and Design My Room tools to explore design possibilities.
Conclusion
A functional small bathroom is not created by squeezing the largest possible number of fittings into a limited area. It comes from choosing the right fixtures, placing them thoughtfully and keeping movement clear.
Start with accurate measurements, resolve the door and shower arrangement, select a practical vanity and use vertical or recessed storage. When drainage, lighting and ventilation are planned alongside the layout, even a compact bathroom can become easier to use and maintain.
The goal is simple: make every part of the bathroom work comfortably, without wasting the space you have.
Plan Your Home with Walls to Wonder
Make more informed interior design decisions with Walls to Wonder's AI-powered tools. Explore layouts, visualise design ideas and plan your project with greater clarity.
- Whole Home Visualizer – Visualise design ideas across your home.
- Design My Room – Explore different room layouts and styles.
- Interior Design Cost Estimate – Estimate your interior design budget.
- Interior Quotation Checker – Review and compare interior design quotations.
- Rate My Room Design – Get feedback on your room design.
- Interior Style Finder – Discover an interior style that suits your preferences.
Visit Walls to Wonder to explore more home design ideas and tools.
Frequently Asked Questions
1. What is the best layout for a small bathroom?
The best layout depends on the room's shape, entrance and plumbing positions. A linear arrangement can work well in a narrow bathroom, while a corner shower may help free up the remaining floor area.
2. How can I make a small bathroom feel more spacious?
Keep the floor clear, use compact fixtures, choose a restrained colour palette and consider a large mirror. Wall-mounted fittings and recessed storage can also reduce visual clutter.
3. Is a sliding door suitable for a small bathroom?
Yes, if there is enough wall space and the wall construction supports the chosen sliding or pocket-door system. Check privacy, hardware and access before installation.
4. Which shower arrangement works best in a compact bathroom?
A fixed glass panel, sliding enclosure or well-fitted shower curtain may work, depending on the available space. The choice should account for access, splash control, drainage and cleaning.
5. How do I add storage without making a small bathroom crowded?
Use mirrored cabinets, recessed shower niches, slim shelves and carefully positioned tall cabinets. Keep storage away from the main walking path.
6. Should I choose a wall-hung toilet for a small bathroom?
A wall-hung toilet can make the floor easier to clean and create a lighter visual effect. It requires suitable structural support, concealed cistern space and access for maintenance.
7. Are large tiles suitable for small bathrooms?
They can be, as fewer grout lines may create a more continuous appearance. However, select floor tiles based on wet-area suitability and slip resistance, not just size or appearance.
8. What should I check before renovating a small bathroom?
Measure the room, confirm plumbing and drainage, check door and fixture clearances, plan waterproofing and ventilation, and finalise the layout before buying fittings or starting tile work.
Turn this idea into a plan for your home
Visualise your space, understand the likely budget, or find a professional who can bring the idea to life.