
Setting Up an Interior Budget Spreadsheet: A Step-by-Step Guide
Planning your home interiors involves more than deciding how much to spend on furniture, wardrobes or a modular kitchen. There are design fees, materials, labour, electrical work, delivery, installation and several smaller expenses that can add up during execution.
When these costs are spread across quotations, messages, notebooks and payment receipts, it becomes difficult to know how much you have actually committed or how much money is still available.
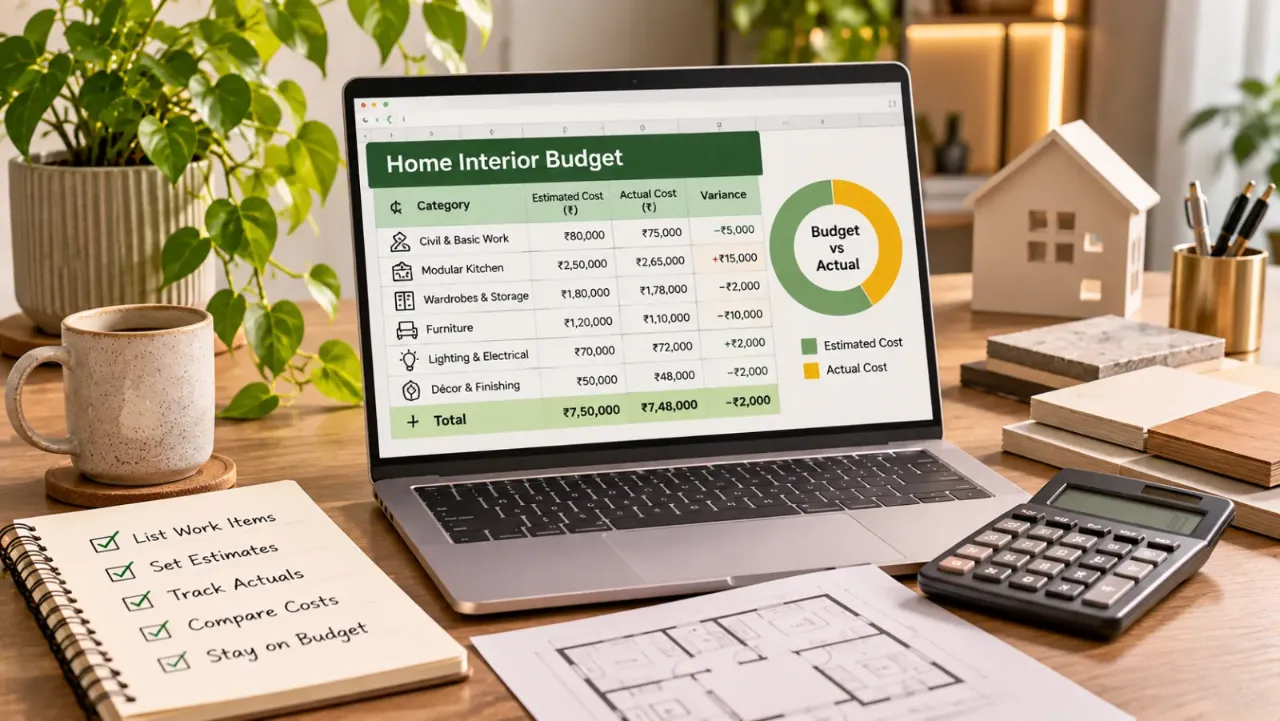
An interior budget spreadsheet brings these details into one place. It allows you to plan expenses, record quotations, compare estimated and actual costs, track payments and identify budget overruns before they become difficult to manage.
You do not need advanced Excel skills to create one. A basic spreadsheet in Microsoft Excel or Google Sheets is enough to get started.
1. Start With Your Total Project Budget
Before entering individual expenses, decide the maximum amount you are comfortable spending on the interior project. This should be your overall spending limit, not simply the amount mentioned in the first designer's quotation.
For example, assume you have allocated ₹8 lakh for your home interiors. You might reserve ₹80,000 as a contingency amount for unexpected repairs, additional work or changes during execution.
| Budget component | Illustrative amount |
|---|---|
| Total available budget | ₹8,00,000 |
| Contingency reserve | ₹80,000 |
| Planned project budget | ₹7,20,000 |
These figures are only an example. Your reserve should reflect the condition of the property, project scope and uncertainty involved.
Record the total budget, contingency reserve and planned spending limit at the top of your spreadsheet. This gives you a clear reference point whenever you add a new expense.
2. Create Separate Sheets for Different Purposes
Avoid putting every detail into one crowded worksheet. A simple workbook can have four sheets:
- Budget Overview: Total budget, planned spending, actual spending and remaining balance.
- Room-wise Budget: Planned and actual expenses for each room or work area.
- Expense Tracker: Individual purchases, services, quotations and bills.
- Payment Tracker: Advances, instalments, payments made and pending amounts.
This arrangement makes the spreadsheet easier to update and review.
3. Build Your Budget Overview
The first sheet should give you a quick picture of the project's financial position.
| Budget overview | Amount |
|---|---|
| Total available budget | ₹8,00,000 |
| Contingency reserve | ₹80,000 |
| Planned project budget | ₹7,20,000 |
| Total estimated cost | ₹7,00,000 |
| Actual expenses recorded | ₹2,40,000 |
| Remaining planned budget | ₹4,80,000 |
The figures above are illustrative. The actual expense total should update as you enter new transactions.
Useful formulas include:
- Planned project budget: Total budget minus contingency reserve.
- Remaining planned budget: Planned project budget minus actual expenses.
- Budget variance: Actual expenses minus estimated expenses.
A positive budget variance means spending is higher than estimated. A negative variance means spending is currently below the estimate.
Keep the contingency reserve separate so that you can see whether the planned work is exceeding its allocation without accidentally treating your emergency buffer as spare spending money.
4. Add a Room-wise Budget Sheet
Once your overall budget is established, divide the planned work into rooms and shared project expenses.
- Living room
- Kitchen
- Master bedroom
- Other bedrooms
- Bathrooms
- Dining area
- Entryway and utility
- Common electrical, plumbing and painting work
For each area, enter the planned allocation, estimated cost and actual expenses.
| Work area | Planned budget | Estimated cost | Actual cost |
|---|---|---|---|
| Kitchen | ₹1,80,000 | ₹1,75,000 | ₹65,000 |
| Living room | ₹1,00,000 | ₹95,000 | ₹30,000 |
| Master bedroom | ₹1,40,000 | ₹1,35,000 | ₹50,000 |
| Other bedroom | ₹1,10,000 | ₹1,05,000 | ₹35,000 |
| Bathrooms | ₹90,000 | ₹85,000 | ₹25,000 |
| Common work | ₹1,00,000 | ₹1,05,000 | ₹35,000 |
| Total | ₹7,20,000 | ₹7,00,000 | ₹2,40,000 |
These are sample figures, not recommended room-wise spending percentages.
Keep shared expenses separate instead of assigning the same electrical, plumbing or painting cost to multiple rooms. This avoids double-counting.
5. Set Up the Main Expense Tracker
This is the most important working sheet. Every expense, whether large or small, should be recorded here.
| Column | What to enter |
|---|---|
| Date | Date of quotation, purchase or payment |
| Expense ID | Unique reference number |
| Room/Area | Where the expense belongs |
| Category | Material, labour, furniture, electrical, etc. |
| Description | Specific item or service |
| Vendor | Supplier, contractor or designer |
| Estimated cost | Amount initially planned |
| Quoted cost | Amount offered by the vendor |
| Actual cost | Final amount incurred |
| Paid amount | Amount already paid |
| Pending amount | Amount still due |
| Status | Planned, approved, ordered, received or completed |
| Notes | Warranty, invoice number or other details |
For example, instead of writing only "Kitchen work", record individual entries such as plywood, laminate, hinges, drawer channels, countertop, installation and electrical changes.
This makes it easier to identify which part of the project is responsible for a cost increase.
6. Add Simple Formulas to Automate Calculations
You do not need complicated Excel functions. A few basic formulas can make the spreadsheet much more useful.
Assume your expense tracker uses the following columns:
- G: Estimated cost
- H: Quoted cost
- I: Actual cost
- J: Paid amount
- K: Pending amount
- L: Budget variance
For the first expense row, you can use:
=MAX(0,I2-J2)
=I2-G2
=SUM(I2:I100)
=SUM(J2:J100)
=SUM(K2:K100)
Adjust the cell references if your spreadsheet uses different column positions.
One important distinction: an unpaid bill can still be an incurred expense. Keep the actual cost and paid amount in separate columns so that your budget does not appear lower simply because a vendor has not yet been paid.
7. Create a Separate Payment Tracker
Interior projects often involve multiple payment stages. A separate sheet helps you see what has been paid and what is still due.
Include:
- Vendor or contractor name
- Work or service
- Agreed project amount
- Payment milestone
- Due date
- Amount due
- Amount paid
- Payment date
- Balance pending
- Payment reference
| Payment milestone | Amount due | Amount paid | Balance |
|---|---|---|---|
| Initial advance | ₹30,000 | ₹30,000 | ₹0 |
| Material purchase | ₹50,000 | ₹40,000 | ₹10,000 |
| Installation stage | ₹25,000 | ₹0 | ₹25,000 |
| Final handover | ₹15,000 | ₹0 | ₹15,000 |
These are hypothetical amounts. Actual payment schedules should follow the agreed contract and verified work milestones.
Record every payment with its date and transaction reference. This is especially useful when payments are made to different vendors at different stages.
8. Use Colour Coding to Identify Budget Problems
A spreadsheet should help you notice problems quickly, not just store numbers.
- Green: Actual cost is within the allocated budget.
- Yellow: Spending is approaching the budget limit.
- Red: Actual cost has exceeded the allocation.
- Grey: Expense is planned but not yet approved.
You can also use conditional formatting to highlight amounts and drop-down lists for categories and status fields. This keeps entries consistent and makes filtering easier.
For instance, if one entry is labelled "Electrical" and another is labelled "Electric work", the spreadsheet may treat them as separate categories. A standardised drop-down list prevents this.
9. Update the Spreadsheet Throughout the Project
Creating the spreadsheet is only the first step. It is useful only when you keep it updated.
- When you receive a quotation: Record the vendor, quoted amount and included scope.
- When you approve the work: Update the status and agreed amount.
- When you place an order: Record the purchase and expected delivery.
- When you make a payment: Enter the amount, date and transaction reference.
- When work is completed: Update the actual cost and completion status.
- When additional work is requested: Add a separate entry and revise the projected total.
Do not overwrite an earlier estimate simply because the price has changed. Keeping the original estimate allows you to understand where the budget moved and why.
10. Common Mistakes to Avoid
A spreadsheet can still give you the wrong picture if the information is incomplete.
- Recording only major expenses and ignoring delivery, transport and installation.
- Mixing quoted amounts, actual expenses and payments made.
- Forgetting taxes or charges that apply to the project.
- Counting shared expenses under more than one room.
- Treating an unapproved quotation as a confirmed expense.
- Using the contingency reserve for optional upgrades.
- Deleting old estimates instead of recording revisions.
- Failing to reconcile expenses against invoices and receipts.
The aim is not to make the spreadsheet complicated. It is to make sure every important financial decision is visible.
11. A Final Checklist Before You Start
- Total available project budget
- Separate contingency reserve
- Room-wise allocations
- Shared project expenses
- Individual expense entries
- Estimated, quoted and actual costs
- Payments made and pending
- Vendor and invoice details
- Budget variance calculations
- Status and approval tracking
- A regular update routine
The Professional Judgement: Track the Decision, Not Just the Amount
A good interior budget spreadsheet is not simply a list of numbers. It is a record of what you planned, what was quoted, what you approved and what you eventually spent.
Keep supporting quotations, invoices and approvals alongside your records. When a cost changes, note the reason rather than silently replacing the original figure.
This gives you a clearer view of the project and helps you make informed decisions before small changes turn into major budget overruns.
Use AI Before You Finalise Your Interior Budget
Before meeting an interior designer or approving a quotation, you can use Walls to Wonder's AI tools to organise your requirements, explore design possibilities and review your estimated costs.
Estimate Your Interior Cost
Get an initial estimate based on your home and requirements.
Estimate Interior CostCheck Your Quotation
Review quotation details and identify areas that may need clarification.
Check Your QuotationVisualise Your Whole Home
Explore design possibilities across different spaces in your home.
Open Whole Home VisualizerDiscover Your Interior Style
Explore styles that may suit your preferences.
Find Your Interior StyleFrequently Asked Questions About Interior Budget Spreadsheets
1. Can I create an interior budget spreadsheet in Google Sheets?
Yes. Google Sheets works well for basic budget tracking and allows you to update the spreadsheet from different devices. Excel is another suitable option.
2. What categories should an interior budget spreadsheet include?
Include design fees, civil work, electrical and plumbing, materials, modular furniture, loose furniture, lighting, appliances, labour, transport, installation and contingency.
3. Should I track estimated costs and actual costs separately?
Yes. Estimated costs show what you initially planned to spend, while actual costs record what the project has incurred. Keeping both helps you identify overruns.
4. How do I calculate the remaining interior budget?
Subtract total actual expenses from your planned project budget. Keep the contingency reserve separate so that it is not accidentally treated as available spending money.
5. How often should I update my interior budget spreadsheet?
Update it whenever you receive a quotation, approve work, make a payment, purchase materials or agree to additional work. A weekly review is also useful during active execution.
6. Should I include unpaid bills in the budget tracker?
Yes. Record the full incurred expense separately from the amount paid. This prevents unpaid bills from being mistaken for available budget.
7. How much contingency should I keep for home interiors?
There is no fixed amount suitable for every project. The reserve depends on the property's condition, scope of renovation and uncertainty around existing services or structures.
8. Can one spreadsheet track multiple rooms and vendors?
Yes. Use room and vendor columns, standardised categories and filters. Separate worksheets for room-wise budgets, expenses and payments make larger projects easier to manage.
Plan your interiors with clarity, keep your expenses organised and make every budget decision count. Explore more home planning resources and design tools on Walls to Wonder.
Get a personalised estimate for your home
Choose your rooms, materials and preferences to understand a practical interior budget before you commit.