
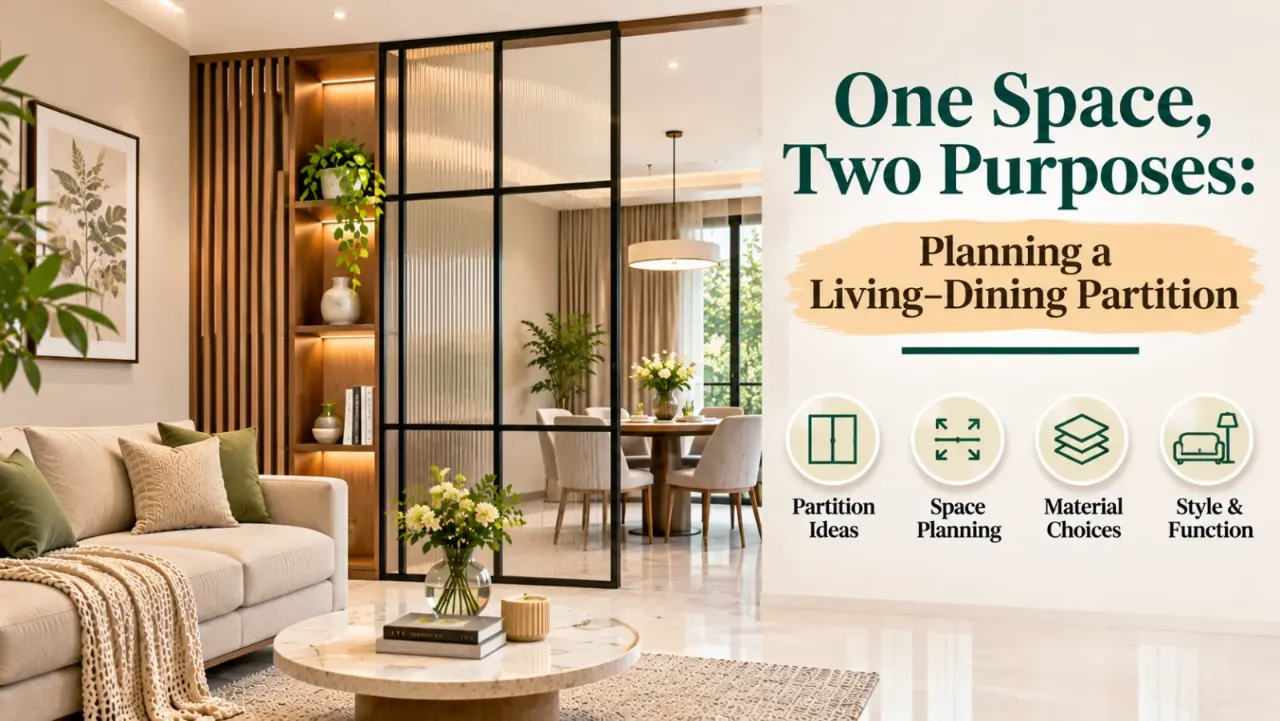
One Space, Two Purposes: Planning a Living–Dining Partition
In many modern homes, the living room and dining area share one continuous space. This arrangement can make a home feel larger and allow natural light to travel further, but it can also leave the two areas without a clear sense of identity. A sofa may visually blend into the dining setup, the television may become the main focus from every angle, or the dining table may feel as though it is placed in the middle of the living room.
A thoughtfully planned partition can solve this without turning an open layout into two enclosed rooms. The aim is to create a visual or functional boundary while preserving comfortable movement, light and a sense of connection.
Before choosing a design, consider the layout, the purpose of the divider, the materials available and the amount of space you can comfortably give up.
1. Decide What the Partition Needs to Do
Start with the problem you want the partition to solve. A divider should have a clear purpose rather than simply occupy an empty space.
Common reasons to add a living–dining partition include:
- Visual separation: Give the living and dining areas their own identity.
- Privacy: Reduce direct views from one zone into the other.
- Storage: Add shelves, cabinets or display niches.
- Space definition: Make furniture arrangements feel more organised.
- Design continuity: Introduce a feature that connects the two areas through materials, colours or finishes.
One home may need only a light visual divider, while another may benefit from a more substantial storage unit. Decide which function matters most before selecting a material or style.
2. Choose the Right Type of Partition
The best partition depends on the available floor area, the amount of privacy required and the overall interior style.
Open Wooden Slat Partition
Vertical or horizontal wooden slats create a boundary while allowing light and views to pass through. The spacing between slats can make the divider feel either open or more private. This option works well when you want a warm material that complements wooden furniture, flooring or cabinetry. Consider the finish and cleaning requirements, especially in a home where dust accumulates quickly.
Glass Partition
Glass helps maintain visual openness while separating the two zones. Clear glass offers the least visual obstruction, while fluted or frosted glass provides more privacy. A framed glass partition can become a strong design feature, whereas a minimal-framed system creates a quieter appearance. The glass specification, support and fittings should be confirmed by a qualified glazing professional.
Metal or Metal-and-Glass Partition
Metal frames can create a structured, contemporary look. They can be paired with clear, frosted or textured glass, or used as open geometric screens. Check the frame finish, joint detailing and suitability for the room's conditions before approving the design.
Half-Height Partition
A half-height divider defines the boundary without blocking the entire view. It can be useful when you want to separate furniture zones while keeping the space visually connected. The top surface may also support carefully selected decor, but avoid turning it into a cluttered display ledge.
Partition With Storage
A double-sided shelf, display unit or low cabinet can make the divider work harder. It may hold books, decor, tableware or everyday items, depending on which side is accessible. Storage partitions need more careful planning because their depth, door openings and access can affect movement through the room.
Decorative Screen or Jaali
A patterned screen can introduce detail and filtered views without creating a solid wall. It may be made from wood, metal or another suitable material. The pattern should relate to the home's overall design language. A highly detailed screen can become visually dominant, so balance it with simpler furniture and finishes.
3. Plan the Position Before the Design
The partition's location can matter more than its appearance. A divider placed in the wrong position may obstruct the route between the entrance, living room, dining table or kitchen.
Begin by marking the main furniture positions on the floor plan:
- Sofa and other living-room seating.
- Television unit or focal wall.
- Dining table and chairs.
- Main entry and passage routes.
- Doors, windows and balcony access.
- Any nearby kitchen or circulation opening.
Then identify the natural boundary between the two zones. The partition should reinforce that boundary, not create an awkward detour.
A useful approach is to test the proposed divider with temporary floor markings before committing to fabrication. This helps reveal whether the partition feels too large, blocks a view or interferes with daily movement.
4. Get the Measurements Right
There is no single ideal dimension for every living–dining partition. The right size depends on the room, furniture, circulation and the type of divider.
Measure the following before finalising the design:
- Available width: Measure the full opening and identify how much of it should remain open. A full-width divider may be unnecessary when a partial screen can create enough separation.
- Height: A low divider preserves more visual connection, while a taller screen provides stronger definition. Check ceiling height, lighting positions and the visual proportions of the room.
- Depth: Open screens may need less depth than cabinets or double-sided storage units. Make sure the divider does not reduce the usable area around furniture.
- Furniture clearance: Check that dining chairs can be pulled out and that people can move around the sofa and table without repeatedly squeezing past the partition.
- Door and passage clearance: Consider the movement of hinged doors, sliding panels and nearby entry routes.
As a practical planning exercise, draw the partition and furniture to scale on the floor plan. Test the arrangement with chairs pulled out and doors in their open positions, not just when everything is tucked away.
5. Select Materials for Everyday Use
A partition is part of the daily-use environment, so its material should be selected for more than appearance.
- Wood and engineered boards: These offer warmth and can be used for slats, panels, shelves and storage. Select suitable boards and finishes for the intended application, and protect edges from moisture and damage.
- Metal: Metal can create slim frames and decorative screens. The finish and protection should be suitable for the indoor environment, and exposed joints should be neatly detailed.
- Glass: Glass maintains light and visual connection. The type, thickness, edge treatment, framing and fittings need to be specified for the actual panel and installation.
- Stone or solid-surface finishes: These can create a substantial feature or cladding on a partition, but weight, support and fixing methods need to be considered.
- Mixed materials: Combining wood, metal, glass or textured finishes can create a layered look. Keep the palette controlled so that the partition feels connected to the rest of the home.
Ask suppliers about cleaning, repair, finish durability and replacement availability before making the final choice.
6. Style the Partition Without Overcrowding It
The partition should look like part of the interior rather than an isolated feature.
- Repeat one material or finish from the living room or dining area.
- Use a consistent colour family across both zones.
- Keep open shelves selective rather than filling every section.
- Use lighting to highlight the partition only where it adds value.
- Coordinate metal finishes with handles, light fittings or furniture details.
- Keep patterns and textures in balance with nearby walls and upholstery.
If the partition is already visually detailed, let the surrounding furniture and decor remain relatively restrained. If the divider is simple, a carefully chosen light fitting, artwork or display arrangement can add character.
7. Think About Light, Ventilation and Visibility
A partition should not make the home feel darker or more cramped.
Open slats, screens and glass can preserve some visual connection, while solid panels provide stronger separation. Consider the direction of natural light and whether the divider will cast shadows on the dining area or living room.
Also check whether the partition affects ventilation, access to windows or the operation of curtains and blinds. A design that looks attractive in a static drawing may feel inconvenient once the room is in use.
For homes with limited daylight, a lighter or more open divider may be a better starting point than a full-height solid structure.
8. Common Planning Mistakes to Avoid
Some partition designs look impressive but create everyday problems.
- Making the divider too wide or too deep for the room.
- Blocking the easiest route between the living room and dining area.
- Ignoring the space needed to pull out dining chairs.
- Choosing a solid partition that unnecessarily reduces natural light.
- Adding storage without considering access from both sides.
- Mixing too many materials, colours or patterns.
- Selecting a finish that is difficult to clean in a high-use area.
- Forgetting electrical points, switches or lighting that may be affected.
- Finalising dimensions before the sofa, table and other large furniture are positioned.
A successful design is one that works with the room's actual layout, not just the elevation or reference image.
9. A Checklist Before You Finalise the Partition
Before approving the design, confirm the following:
- The main purpose of the partition is clearly defined.
- Its position works with the living and dining furniture.
- The proposed width, height and depth are measured on site.
- Walking routes and chair clearances are comfortable.
- The selected material suits everyday use and maintenance.
- Natural light and ventilation are not unnecessarily restricted.
- Shelves, cabinets and display sections are accessible.
- Lighting, switches and electrical points are accounted for.
- Fixing, support and installation details are documented.
- The quotation clearly lists materials, finishes, hardware, labour and installation.
A clear plan helps prevent last-minute changes and makes it easier to compare design and execution proposals.
Final Thought
A living–dining partition should create definition without making the home feel divided. The right solution may be a simple wooden screen, a glass divider, a decorative jaali or a practical storage unit. What matters is how well it fits the layout and the way the household uses the space.
Start with the purpose, measure around the furniture and choose materials that are practical to maintain. When these decisions are made together, the partition becomes a natural part of the home rather than an obstacle between two rooms.
Explore More with Walls to Wonder
Planning a living–dining layout? Start with Design My Room to explore room concepts, finishes and furniture choices.
Use the Whole Home Visualizer to explore how the partition can coordinate with the rest of your home.
For preliminary budget planning, try the Interior Design Cost Estimate. When you receive a contractor's proposal, the Interior Quotation Checker can help review the scope, materials, charges and exclusions.
These tools support design exploration and preliminary planning. Final measurements, fixing details and material suitability should be confirmed with the relevant professionals.
Frequently Asked Questions
1. Which partition is best between a living room and dining room?
It depends on the space and the desired level of separation. Wooden slats and decorative screens keep the layout open, glass maintains visual connection, and storage partitions add practical function.
2. Is a full-height partition necessary?
No. A partial-height screen or half-height divider may be enough to define the two zones. The decision depends on privacy, room proportions, light and circulation.
3. How do I choose the right partition material?
Consider appearance, durability, cleaning, moisture exposure, installation requirements and repair options. The material should suit both the room's design and its everyday use.
4. Can a partition make a small living–dining room look smaller?
It can, particularly if it is bulky, dark or blocks too much of the view. Open designs, slim profiles and lighter finishes can help preserve a sense of space.
5. Can a partition between the living and dining areas include storage?
Yes. Double-sided shelves, low cabinets and display units can provide useful storage. Their depth and access should be planned so they do not obstruct movement.
6. What should I measure before installing a partition?
Measure the available opening, ceiling height, proposed partition depth, furniture positions, chair pull-out space, door movement and main walking routes. Confirm the dimensions on site before fabrication.
Turn this idea into a plan for your home
Visualise your space, understand the likely budget, or find a professional who can bring the idea to life.