
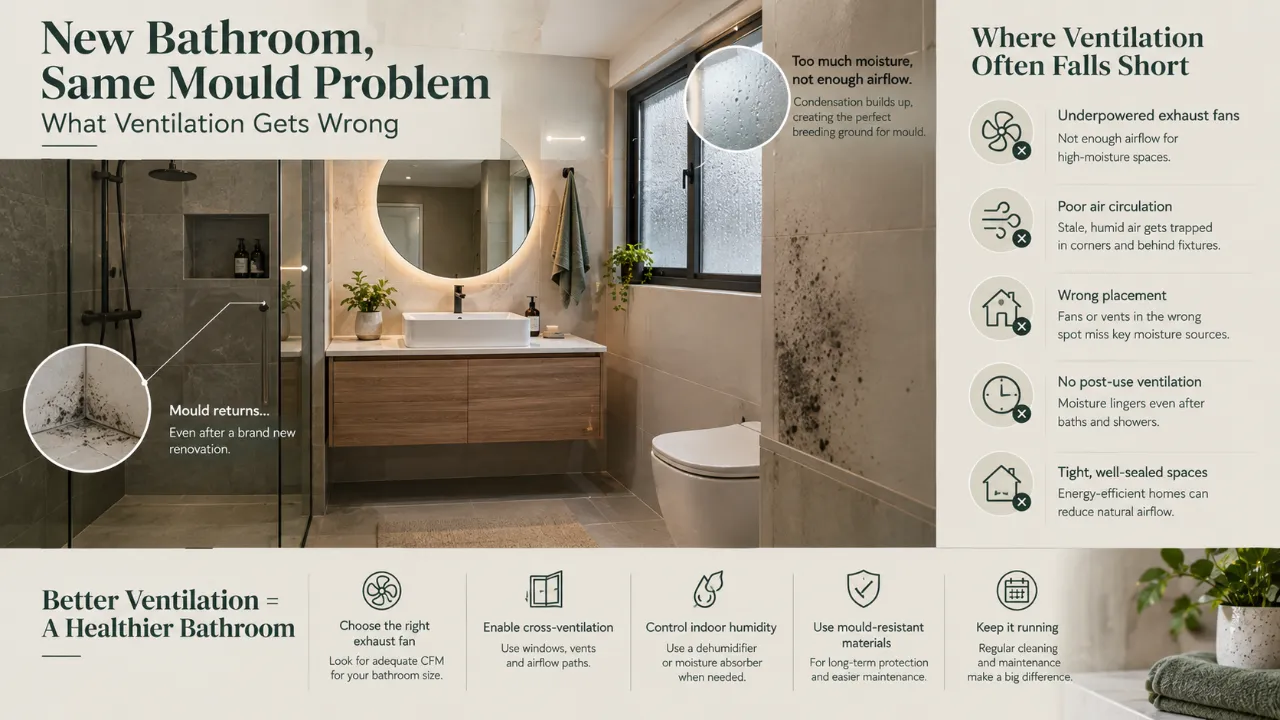
New Bathroom, Same Mould Problem: What Ventilation Gets Wrong
A bathroom can be brand new and still develop mould.
New tiles. Fresh paint. New fittings. A recently completed ceiling.
And then, a few months later, dark patches begin appearing around the ceiling, corners, grout lines, silicone joints or behind fittings.
It is easy to blame the paint, tiles or cleaning routine.
But very often, the bigger question is:
Where is all the moisture going?
- Why mould is not always a ventilation problem
- Exhaust-fan mistakes
- Why exhaust must reach the exterior
- Why fan location matters
- Why replacement air matters
- Why a window is not always enough
- Why the fan should keep running after showers
- How ducting can reduce performance
- False ceilings and hidden moisture
- Wet/dry zoning and airflow
- Condensation and ceiling mould
- Bathroom ventilation checklist
First, Mould Is Not Always a Ventilation Problem
Mould can be associated with excess moisture from leaks, condensation, poor ventilation, water intrusion, wet materials and persistent dampness.
So if mould keeps returning to one very specific location, do not automatically assume the exhaust fan is the only problem.
Mistake 1: Installing an Exhaust Fan Because “There Is One”
A bathroom fan existing on the ceiling does not necessarily mean the bathroom is properly ventilated.
The important question is whether it is actually removing enough humid air. Simply hearing the motor running is not proof of sufficient airflow.
Mistake 2: Venting the Bathroom Into the False “Outside”
Exhaust air needs somewhere to go.
It should not simply be released into an attic, false-ceiling cavity, service void or another enclosed internal space.
The exhaust should be designed to discharge outdoors rather than relocating the moisture elsewhere in the building.
Mistake 3: Putting the Fan Too Far From the Main Moisture Source
Showers and baths are major sources of moisture, so the exhaust point needs to capture humid air effectively.
HVI guidance recommends locating exhaust points over or near showers or tubs when possible.
If the shower is at one end of a long bathroom and the exhaust point is far away, moisture may spread throughout the room before reaching the extraction point.
Mistake 4: Making the Bathroom Too Airtight Without a Fresh-Air Path
An exhaust fan removes air. Something has to replace that air.
HVI guidance notes that exhausted air needs makeup air from adjacent areas and recommends providing an appropriate path for that air to enter.
A very closed bathroom with little replacement-air movement can reduce how effectively the exhaust system works.
Mistake 5: Assuming a Window Replaces Proper Ventilation
A window can help, but it is not automatically a substitute for effective mechanical exhaust.
Its performance depends on weather, wind, opening size, external air movement, privacy and whether it is actually used.
HVI notes that reliable ventilation should not depend entirely on occupant behaviour or unpredictable natural airflow.
Mistake 6: Switching the Fan Off the Moment the Shower Ends
The bathroom may look clear of steam, but moisture can remain on walls, ceilings, mirrors, tiles, grout, glass and fixtures.
HVI recommends allowing bathroom exhaust fans to continue operating after use and identifies a timer as one practical way to achieve this. Its current guidance recommends at least 20 minutes after use.
Mistake 7: Choosing a Fan Based Only on Noise
A quiet bathroom is desirable, but the quietest fan is not automatically the most effective fan.
The fan needs suitable airflow capacity for the room and its moisture load.
Mistake 8: Ignoring the Duct
A good fan can still perform poorly if the duct system is badly planned.
- Long duct runs
- Sharp bends
- Poor connections
- Incorrect duct sizing
- Blocked sections
- Improper exterior termination
HVI notes that duct length, materials, bends and termination devices affect the resistance the fan must overcome.
Mistake 9: Hiding Everything Above a False Ceiling
A false ceiling can make a bathroom look clean, but it can also make ventilation problems harder to inspect.
If duct connections are loose or moisture accumulates inside the ceiling cavity, the problem can remain hidden.
Before closing the ceiling, resolve the ventilation route, service access and maintenance requirements.
Mistake 10: Treating the Exhaust Fan as a Decorative Fixture
An exhaust fan is part of the building's moisture-management system.
Airflow
The fan needs appropriate capacity for the application.
Location
The exhaust point should capture humid air effectively.
Duct Route
Extracted air needs an effective path to the exterior.
Controls
The operating strategy should allow adequate post-shower ventilation.
Mistake 11: Blocking Airflow With Design Features
Large shower enclosures, glass partitions, full-height storage, decorative ceilings and separate zones can all be excellent design decisions.
But they can also change airflow patterns.
The more compartmentalised the bathroom becomes, the more carefully ventilation needs to be considered.
Mistake 12: Creating a Wet Zone Without Planning How It Dries
Separating wet and dry zones is useful for managing splashing and bathroom use.
But zoning does not automatically solve moisture.
They are related, but they are not the same problem.
Mistake 13: Assuming Waterproofing Prevents Mould
Waterproofing and ventilation solve different problems.
Waterproofing helps control liquid water intrusion. Ventilation helps control moisture in the air.
You can have excellent waterproofing and still have mould caused by persistent humidity and condensation.
Mistake 14: Ignoring Condensation
Condensation occurs when humid air meets a surface that is cool enough for moisture to form.
In bathrooms, condensation can appear on mirrors, tiles, windows, pipes, ceilings, external walls and metal fixtures.
Repeated condensation means water is repeatedly being deposited onto surfaces, which can contribute to persistent damp conditions.
Mistake 15: Forgetting the Ceiling
If the bathroom ceiling repeatedly becomes damp after showers, it is a clue that humid air is reaching the upper part of the room and condensing there.
This can be especially noticeable in:
- Small bathrooms
- Bathrooms with poor exhaust placement
- Bathrooms with inadequate airflow
- Bathrooms with enclosed showers
- Bathrooms where high humidity remains for long periods
Mistake 16: Using Materials That Make Moisture Harder to Manage
Materials alone do not prevent mould, but poor detailing can make moisture management and maintenance harder.
- Porous surfaces
- Moisture-sensitive boards
- Poorly sealed joints
- Damaged silicone
- Open gaps around fixtures
- Hidden edges that remain damp
Mould prevention is not simply about selecting a “mould-resistant” paint. The entire moisture environment matters.
Mistake 17: Ignoring Silicone Joints and Hidden Edges
Silicone around showers, sinks and fixtures is exposed to repeated moisture.
If joints are poorly detailed, damaged or difficult to keep dry, they can become places where mould or staining repeatedly appears.
Mistake 18: Designing the Bathroom Without Thinking About Drying Time
A bathroom does not become dry simply because the shower has stopped.
Water can remain on surfaces, towels can stay damp, shower enclosures can retain humid air and floors can remain wet.
The room needs a combination of ventilation, air movement, drainage, appropriate surface detailing and practical user habits.
New Homes Can Actually Make Ventilation More Important
HVI notes that many modern new homes are highly insulated and comparatively airtight, making proper mechanical ventilation particularly important.
This does not mean a new home automatically has a mould problem. It means that new construction should not be assumed to have adequate moisture management without checking the actual ventilation system.
What a Properly Planned Bathroom Ventilation System Looks Like
If one link is weak, the whole system can perform poorly.
| Problem | What Can Happen |
|---|---|
| Weak or undersized exhaust | Humid air remains in the bathroom longer |
| Exhaust routed indoors | Moisture is redistributed into another enclosed space |
| Fan far from shower | Humid air spreads before it is captured |
| No effective replacement-air path | Air movement through the room can be reduced |
| Poor duct routing | Actual airflow can be reduced by system resistance |
| Fan stopped immediately | Remaining moisture is not removed as effectively |
Bathroom Ventilation Checklist
Fan Capacity
Is the fan appropriate for the room and its moisture load?
Fan Location
Is it positioned to capture humid air effectively?
Duct Route
Does the duct have a sensible route to the exterior?
Exterior Termination
Is the exhaust actually discharging outdoors?
Replacement Air
Can air enter the bathroom effectively while the fan operates?
Controls
Can the fan continue operating after the shower?
Maintenance
Can the fan and accessible ventilation components be checked and cleaned?
Wet-Zone Planning
Does the shower layout allow humid air to reach the ventilation system?
What to Check in a Brand-New Bathroom
| Check | Question |
|---|---|
| 1 | Is the exhaust fan actually moving air? |
| 2 | Where does the exhaust duct terminate? |
| 3 | Does the fan continue running after the shower? |
| 4 | Is there a suitable replacement-air path? |
| 5 | Is there repeated condensation? |
| 6 | Could there be a plumbing or waterproofing problem? |
| 7 | Is the mould localised to one particular detail or surface? |
What Not to Do
Do not simply paint over mould, assume new tiles solved the moisture problem, install a stronger-looking fan without checking the duct system, or treat an open door as the only ventilation strategy.
The EPA recommends addressing the underlying moisture source rather than simply covering mould with paint or caulk.
The Design Lesson
Bathroom ventilation is not something to think about after choosing the tiles.
It should be considered alongside:
- Layout
- Wet/dry zoning
- Shower enclosure
- False ceiling
- Electrical planning
- Duct routing
- Window placement
- Door design
- Material selection
- Maintenance access
That is what makes ventilation a design decision, not just an equipment decision.
A Simple Rule to Remember
Where does the water go?
Where does the humid air go?
How does replacement air enter?
How does the room dry afterwards?
Plan the Bathroom Beyond the Finishes
Good bathroom design is about more than tiles and fixtures. Explore room concepts, estimate project costs and connect with interior professionals through Walls to Wonder.
Explore Design My Room, estimate your Interior Design Cost, or explore Interior Designers.
The Final Takeaway
A new bathroom can still grow mould because newness does not equal moisture control.
Fresh tiles cannot compensate for poor exhaust. A beautiful ceiling cannot compensate for a badly routed duct. A waterproofed shower cannot compensate for condensation. And a powerful-looking fan cannot help much if the air has nowhere effective to go.
Ask: “How will this bathroom breathe, exhaust moisture and dry after every shower?”
Frequently Asked Questions
A new bathroom can still develop mould when moisture remains trapped because of poor ventilation, ineffective exhaust, condensation, leaks, damp materials or other moisture problems.
Ventilation guidance from HVI recommends locating exhaust points over or near the shower or tub when possible so humid air can be captured more directly.
Yes. EPA guidance recommends exhausting bathroom moisture directly outdoors rather than into an attic or another enclosed area.
HVI recommends continued ventilation after bathroom use and currently recommends at least 20 minutes after use for intermittent ventilation. A timer can automate this.
A window can help provide natural ventilation, but its effectiveness depends on weather, airflow, opening size and whether it is actually used. It does not automatically replace effective mechanical exhaust.
Repeated shower moisture can raise humidity and create condensation on cooler ceiling surfaces. Poor exhaust or inadequate airflow can allow that moisture to persist.
Waterproofing and ventilation address different moisture sources. Waterproofing helps control liquid water intrusion, while ventilation helps remove humid air and reduce moisture accumulation.
Turn this idea into a plan for your home
Visualise your space, understand the likely budget, or find a professional who can bring the idea to life.