
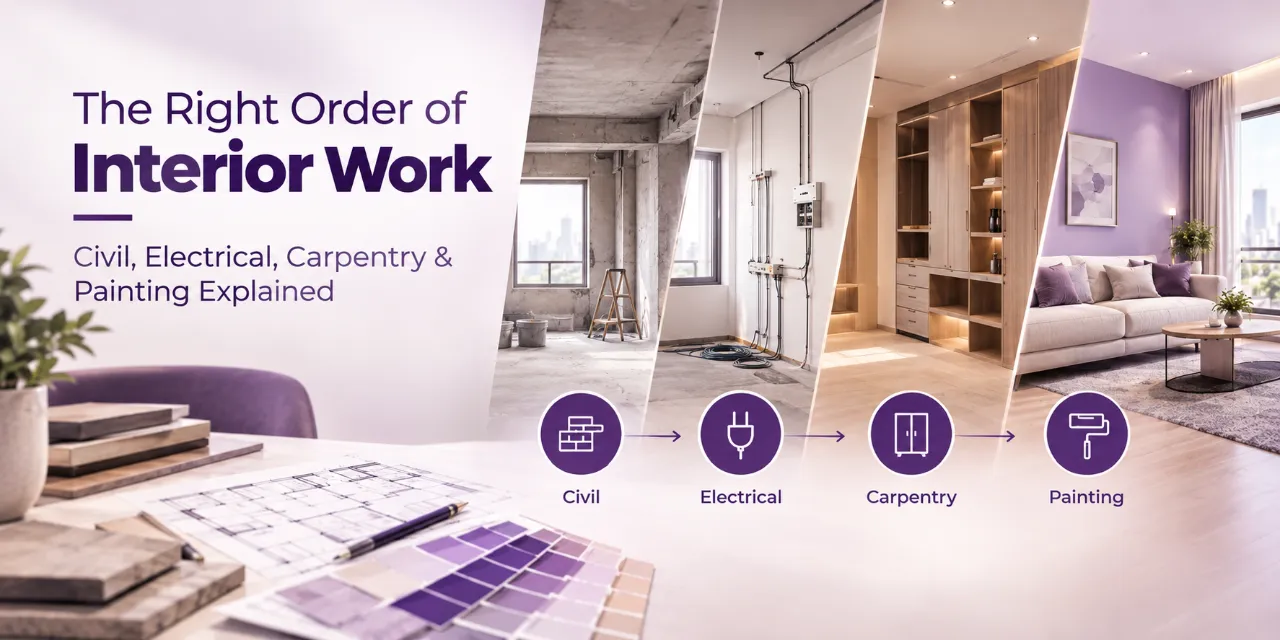
The Right Order of Interior Work: Civil, Electrical, Carpentry & Painting Explained
Planning a home interior is not just about deciding how your kitchen, wardrobes, lighting and walls should look. The order in which the work happens can be just as important as the design itself. When different trades are not coordinated properly, finished work may need to be redone, damaged surfaces may need repairs, and an otherwise manageable project can become more expensive and time-consuming.
For most interior projects, a practical sequence to remember is Civil → Electrical → Carpentry → Painting. The exact schedule can vary depending on the project, but understanding this basic order can help you coordinate the work more efficiently and avoid unnecessary rework.
- Why the order of interior work matters
- Step 1: Civil work
- Step 2: Electrical work
- Step 3: Carpentry
- Step 4: Painting
- The simple sequence to remember
- What can go wrong if you get the sequence wrong?
- A practical interior work checklist
- How the sequence can affect your interior budget
- Frequently asked questions
Why the Order of Interior Work Matters
Interior work involves several different trades, and many of them depend on work being completed before them. Civil work can change walls, floors or the overall layout. Electrical work may require conduits, wiring and points to be planned before surfaces are closed or furniture is installed. Carpentry then works around the completed structure and service points, while painting generally comes towards the finishing stage.
Getting the sequence wrong does not necessarily mean the project cannot be completed, but it can mean additional labour, material wastage, repairs, delays and repeated finishing work.
Step 1: Civil Work — Build the Base
Civil work generally comes first because it can involve changes to the physical structure or surfaces of the home. Before finished furniture, paint and other delicate finishes are installed, the major modifications to the space should be addressed.
What Civil Work Can Include
Depending on the project, civil work may include wall modifications, masonry or partition work, plastering, surface correction, flooring-related work, waterproofing where required, changes to openings and other layout-related modifications.
Why It Comes First
Civil changes can create dust, debris and disruption. Completing major modifications early helps prevent finished furniture, paint and other completed surfaces from being unnecessarily disturbed later.
If a wall needs to be modified, a new partition needs to be created, or a surface needs substantial correction, completing that work after painting or finished carpentry can create unnecessary rework.
The key idea: Complete major civil changes before moving on to concealed electrical work and finished interiors.
Step 2: Electrical Work — Plan What Goes Behind the Finishes
Once the major civil work is in place, electrical planning and installation can follow. This is the stage where the home's wiring, service points and future requirements need to be coordinated with the interior layout.
Electrical Work Can Include
Electrical wiring and conduits, switch and socket points, lighting points, appliance points, AC points, TV and internet points, kitchen appliance connections and other electrical provisions required for the planned interior.
Coordinate With Furniture
Electrical points should be planned with the furniture layout in mind. The requirements beside a bed are different from those behind a TV unit, inside a kitchen or near a study desk.
Planning electrical locations after major carpentry has already been installed can make changes much more difficult. A poorly positioned socket or switch may become hidden behind a wardrobe, cabinet or wall unit.
The key idea: Electrical planning should happen with the furniture layout in mind, not separately from it.
Step 3: Carpentry — Turn the Plan Into Usable Spaces
Once the civil and electrical requirements are sufficiently established, carpentry can begin. This is where the planned interior starts taking shape through built-in furniture, storage and other fixed elements.
Common Carpentry Work
Modular kitchens, wardrobes, TV units, storage units, crockery units, study or work desks, shoe storage, wall panelling and other built-in furniture may all be part of this stage.
Why Site Conditions Matter
Carpentry measurements depend on actual site conditions. Wall dimensions, floor levels, electrical points and other services need to be considered before fabrication and permanent installation.
This is why installing major fixed furniture too early can create problems later. If an electrical point is positioned incorrectly behind a wardrobe or TV unit, correcting it after installation may require part of the furniture to be dismantled or modified.
The key idea: Carpentry should work with the completed site conditions rather than forcing the site to adapt to furniture that was installed too early.
Step 4: Painting — Finish the Visible Surfaces
Painting is often associated with the final transformation of a home, but its timing matters. Major drilling, cutting, furniture installation and other finishing activities can create dust, marks or minor damage to painted surfaces.
Painting Typically Includes
Surface preparation, putty work, primer, paint coats and final touch-ups. The exact number of coats and preparation steps depends on the condition of the surfaces and the chosen finish.
Why Timing Matters
Completing major dusty and disruptive work before the final finish helps reduce the chance of freshly painted surfaces being scratched, stained or marked during installation.
Painting is not necessarily a single one-time stage. Depending on the project, some preparation or primer work may happen earlier, while final coats and touch-ups can happen later.
The key idea: Protect the final finish by coordinating painting around the major installation work.
The Simple Sequence to Remember
If you want to remember the entire process in four words:
| Stage | Main Purpose | Examples |
|---|---|---|
| Civil | Prepare and modify the physical space | Walls, partitions, plastering, flooring-related work and other layout changes |
| Electrical | Complete concealed services and electrical points | Wiring, conduits, switches, sockets, lighting and appliance points |
| Carpentry | Install built-in furniture and storage | Kitchen, wardrobes, TV units, study units and storage |
| Painting | Complete the visible finish | Putty, primer, paint coats and final touch-ups |
This sequence is a useful starting framework, but the actual project schedule may include other specialists and overlapping activities.
What Can Go Wrong If You Get the Sequence Wrong?
The biggest problem with an incorrect sequence is often rework. When one trade has to undo or disturb another trade's completed work, the project can become more expensive and take longer than planned.
Painting Before Major Carpentry
Freshly painted walls can get scratched, marked or stained during drilling, cutting and installation.
Carpentry Before Electrical Planning
Electrical points may end up behind cabinets or in inconvenient locations, potentially requiring modifications after furniture installation.
Civil Work After Finished Interiors
Late wall or flooring modifications can damage furniture, finishes and other completed work.
Electrical Changes After Furniture Installation
Access to concealed wiring and electrical points can become more difficult once wardrobes, kitchens or wall units are fixed in place.
A Practical Interior Work Checklist
Before the first team starts work, make sure you have clarity on the major requirements and how they connect to one another.
- Final furniture and room layouts
- Civil modifications required
- Electrical points and appliance requirements
- Lighting positions
- AC and other service requirements
- Kitchen appliance locations
- Wardrobe and storage locations
- Carpentry measurements
- Flooring and other surface finishes
- Painting requirements
- Which team is responsible for each stage
- The expected sequence and handover between teams
A coordinated plan is especially important when multiple contractors, vendors or specialists are working on the same home.
Where Do Other Interior Works Fit In?
Not every interior project consists only of civil work, electrical work, carpentry and painting. Depending on the home, additional activities such as plumbing, false ceiling work, flooring, HVAC, glass work, polishing and specialised installations may need to be included in the schedule.
For example, false ceiling work needs to be coordinated with electrical and lighting requirements, while plumbing may need to be completed before certain surfaces or fixtures are installed.
The important thing is not to blindly follow four words. It is to understand which work needs access to the site before another finish or installation makes that access difficult.
How the Right Sequence Can Affect Your Interior Budget
The order of work can directly affect the cost of an interior project. When work needs to be repeated, you may end up paying for additional labour, replacement materials, repair work or extra finishing.
For example, repainting a wall because carpentry installation damaged the original finish is an avoidable cost. Similarly, modifying a finished wardrobe to accommodate an incorrectly planned electrical point can involve additional labour and material.
Good sequencing does not automatically make an interior project inexpensive, but it can help reduce avoidable rework and make the overall process more predictable.
Before starting your project, it is useful to understand not only how much your interiors may cost, but also what work is included in that estimate and when it is expected to happen.
Planning Your Interior Budget?
Use Walls to Wonder's Interior Design Cost Estimator to get an initial understanding of your interior budget before you begin the execution process.
Estimate Your Interior CostThe Professional Takeaway: Plan the Sequence Before the Execution
Interior design is often viewed through the final image: the finished kitchen, the wardrobe, the lighting and the painted walls.
But the quality of that final result depends heavily on what happens behind the scenes.
A practical starting sequence is:
Start with the work that changes or prepares the space, move to concealed services, then install the built-in elements, and finish with the visible surfaces.
The exact sequence may change depending on your home's layout, scope and specialist requirements, but one principle remains useful: plan the dependencies before the work begins.
Plan Your Interior With More Clarity
From understanding your potential interior budget to visualising your room and exploring design professionals, Walls to Wonder can help you plan your interior journey before execution begins.
Estimate Your Budget
Create an initial interior budget based on your home, requirements and preferences.
Estimate Interior Cost →Visualise Your Room
Explore a fresh interior concept and get a better idea of how your space could look.
Design My Room →Explore Design Ideas
Discover interior design inspiration and ideas before finalising your direction.
Explore Design Ideas →Find Interior Designers
Explore interior professionals and find designers who can help bring your project together.
Find Interior Designers →Ready to Start Your Interior Project?
Plan your work before execution begins. Understand your budget, organise your requirements, explore design ideas and connect with interior professionals through Walls to Wonder.
Estimate Your Budget Visualise Your Room Find Interior DesignersFrequently Asked Questions About the Order of Interior Work
What is the correct order of interior work?
A practical general sequence is civil work → electrical work → carpentry → painting. However, the exact project schedule can vary depending on flooring, plumbing, false ceiling, HVAC and other specialist work.
Should electrical work be done before carpentry?
Generally, electrical planning and the required wiring or points should be completed before major fixed carpentry is installed. This allows electrical points to be coordinated with the furniture layout.
Should painting be done before or after carpentry?
Final painting is generally better coordinated after major carpentry installation because drilling, cutting and installation can damage finished paint surfaces. Some surface preparation or primer work may happen earlier depending on the project.
Does civil work always come first?
Major civil modifications generally need to be completed early because they can affect walls, floors and the overall layout. However, certain civil or finishing activities may be scheduled later depending on the project.
Where does false ceiling work fit into the sequence?
False ceiling work needs coordination with electrical and lighting requirements. Electrical points and services that need to run within or above the ceiling should generally be planned before the ceiling is closed.
Can electrical and carpentry work happen at the same time?
They can overlap in some projects, but they need close coordination. Electrical points should be confirmed against the latest furniture drawings and site measurements before carpentry is permanently installed.
Why is the order of interior work important?
The right sequence can help reduce unnecessary rework, protect completed finishes, improve coordination between different teams and make the overall project easier to manage.
Final Checklist Before Your Interior Work Begins
- Have you finalised the furniture and room layouts?
- Have all major civil modifications been identified?
- Are electrical points planned according to the furniture layout?
- Have lighting, AC and appliance requirements been considered?
- Are carpentry measurements based on actual site conditions?
- Have you planned when major carpentry installation will happen?
- Have you coordinated painting with the other finishing activities?
- Do all contractors know the expected sequence of work?
- Have you identified additional work such as plumbing, false ceiling, flooring or HVAC that may affect the sequence?
- Do you have a clear project-specific execution plan before work begins?
A well-planned interior is not only about choosing the right materials and finishes. Knowing what should happen first, what should happen next and what needs to wait can make the entire execution process more organised.
Use Walls to Wonder to plan your interior budget, visualise your room, discover interior design ideas and explore interior designers before taking the next step.
Turn this idea into a plan for your home
Visualise your space, understand the likely budget, or find a professional who can bring the idea to life.