
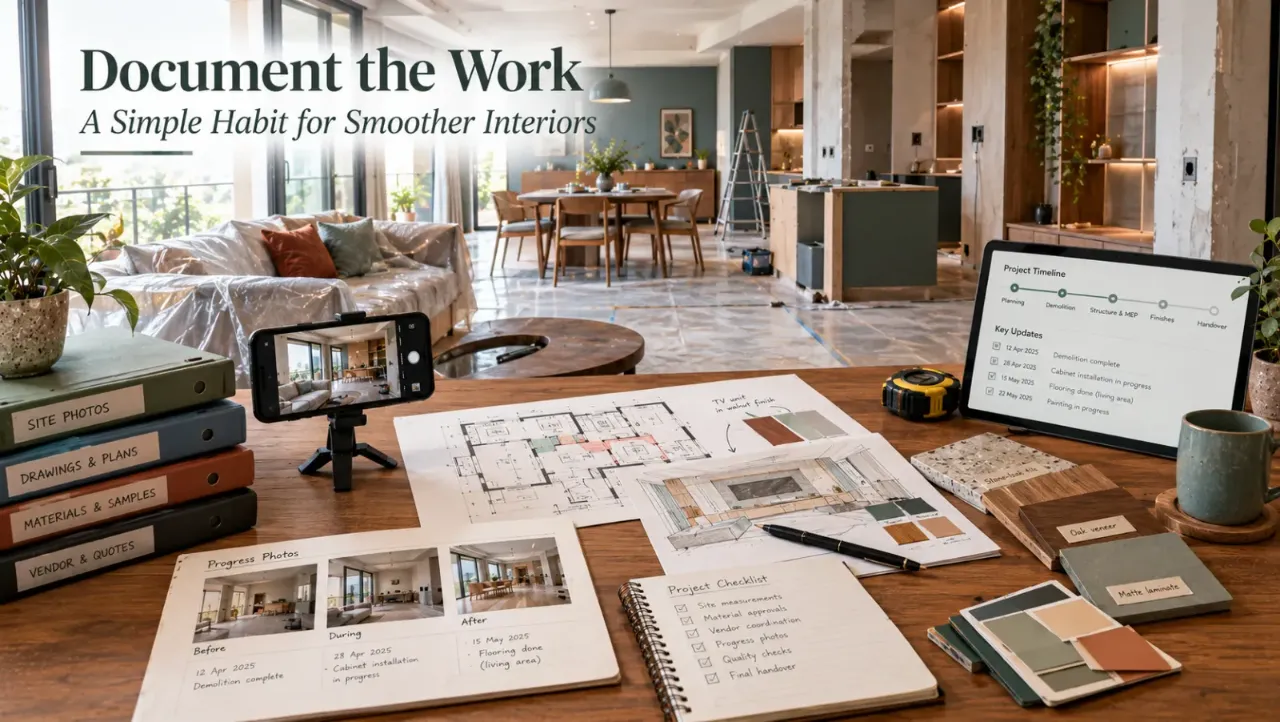
Document the Work: A Simple Habit for Smoother Interiors
A renovation can go smoothly for weeks and then suddenly become an argument: “That's not what we discussed.” “The electrical point was supposed to be there.” “You approved this finish.” “That work wasn't included.” The problem is often not bad intent. It is memory.
Why Progress Photos Matter
A renovation has two versions of reality.
There is the final visible home. And there is everything that happened underneath it.
Once the work is complete, you may never see concealed wiring, plumbing routes, wall repairs, waterproofing preparation, ceiling framing, internal carpentry, insulation, service openings or areas before they were tiled or painted.
That hidden work can matter enormously later.
A progress photo gives you a record of that stage.
becomes
“This is what the site looked like on that date.”
That difference can be surprisingly valuable.
Photos Are Not a Replacement for Drawings or Contracts
Photos help document what happened.
They do not replace:
- Approved drawings
- Specifications
- Quotations
- Contracts
- Invoices
- Variation orders
- Written approvals
A photograph cannot tell you whether a particular item was contractually included.
What it can do is provide visual evidence of the work and site condition at a particular stage.
Think of photos as one layer of project documentation—not the entire documentation system.
What Should You Photograph?
You do not need to photograph every single nail. The goal is to capture important stages and changes.
Work in Progress
Capture the main work happening that day: carpentry, electrical, plumbing, civil work, painting, tiling or ceiling installation.
Hidden Work
Photograph wiring, pipes, waterproofing preparation, framing and other work that will soon become inaccessible.
Changes
Record modifications from the original drawing or approved plan before the change becomes difficult to trace.
Problems
Document visible defects, damaged surfaces, site constraints or unfinished work while they are still obvious.
The Most Valuable Photo Is Often the Boring One
A finished living room is easy to photograph.
The useful photograph may be much less attractive.
An image of a wall showing the exact route of electrical conduits before plastering may be far more valuable months later.
The same applies to bathroom plumbing, kitchen service points, concealed electrical wiring, false-ceiling framing, waterproofing stages, cabinet internals and wall openings.
Don't delete the ugly photographs.
Those are often the photographs you will be glad you kept.
Photograph Before Something Gets Covered
This should become a habit:
Before plaster covers wiring. Before tiles cover plumbing. Before the ceiling closes. Before cabinetry hides the wall. Before paint covers a repaired surface. Before flooring hides the substrate.
The question to ask at every stage is:
If the answer is no, take the photograph now.
Include a Reference Point
A close-up photograph can be useful, but it can also create confusion if you cannot tell where the image was taken.
Try to include something that identifies the location:
- A doorway
- A window
- A column
- A room corner
- A wall edge
- A visible floor pattern
You can also take two images: one wider establishing photo + one closer detail photo.
That combination is often much more useful than ten nearly identical close-ups.
Photograph the Same Area From Similar Angles
Consistency makes progress easier to understand.
For major areas, try to photograph them from roughly the same position as the work progresses.
Now you can actually see how the room changed.
This is useful not only for disputes but also for project tracking.
You may notice that a task has not moved, a change was implemented, a surface was repaired, a feature was removed or another trade has damaged completed work.
Progress photos become a visual timeline.
Put the Date on the Record
Every project's photo record should be tied to a date.
You do not need complicated software. Even a well-organised phone folder can work.
2026-10-09 – Ceiling
2026-10-10 – Carpentry
Date-based organisation makes it much easier to reconstruct what happened later.
Add the Room Name
“IMG_4827.jpg” tells you almost nothing six months later.
“Master Bedroom – Electrical Before Plaster – 8 Oct” tells you much more.
Use simple naming.
Now your photo archive becomes a record rather than a camera roll full of random images.
Photograph Approved Changes
Renovations rarely stay 100% identical to the first drawing.
A homeowner may shift a socket. A wardrobe may change internally. A light may move. A niche may become larger. A different tile may be selected. A wall may be retained instead of removed.
These changes should ideally be documented through the appropriate written approval process.
A photograph can then become part of that record.
That is much clearer than trying to reconstruct the decision months later from memory.
Don't Photograph Only the Finished Result
This is another common mistake.
A homeowner photographs the completed kitchen beautifully but has almost no record of how the kitchen was built.
That means the visual record is strongest precisely when you need it least.
Not just: Finish.
Photograph Materials When They Arrive
Material deliveries can also be worth documenting.
Take photographs of relevant packaging, labels or material batches when appropriate, especially for items where identification matters later.
This can be helpful for:
- Boards
- Hardware
- Tiles
- Sanitaryware
- Lighting
- Appliances
- Paint products
- Specialised finishes
The purpose is not to turn every delivery into paperwork. It is to create a traceable record when material identity or specification could become important.
Photograph Damaged Items Before Installation
Suppose a tile arrives chipped. Or a mirror has a visible mark. Or a laminate panel is damaged. Or a hardware component has an issue.
Photograph it before it disappears into the installation process.
That creates a simple visual record of the condition at the time it was received or inspected.
Once a damaged component has been installed, discussions become harder.
Was it damaged before installation? During installation? After installation?
The earlier photograph may answer that question.
Photograph Completed Work Before the Next Trade Starts
This is another useful checkpoint.
Suppose the painter finishes a wall. The next day, another trade moves furniture, drills a hole or scratches the surface.
Without a record, responsibility can become unclear.
A photograph of the completed surface before the next activity provides a useful reference.
It doesn't automatically prove who caused later damage. But it helps establish the sequence.
Keep Defect Photos Separate From Progress Photos
Not every photograph needs to look positive.
Create a separate category for issues.
Chipped tile
Damaged laminate
Uneven paint
Incomplete wiring
Missing hardware
Unfinished edge
Scratched surface
This makes outstanding issues easier to track.
A simple photo can then be paired with a written note:
Now the photograph is part of an action list.
Use Photos During Site Meetings
Progress photographs become much more powerful when everyone looks at the same information.
Instead of saying, “Remember that wall we discussed?” you can show the photograph.
Instead of, “The pipe was supposed to come this way,” you can review the earlier image.
Instead of, “Was that shutter installed before the change?” you can check the sequence.
The goal is not to use photographs aggressively in disagreements. It is to reduce ambiguity before disagreements grow.
A Photo Can Catch a Problem Before It Becomes Expensive
This may be the biggest benefit.
Imagine you photograph the electrical stage and notice a socket is positioned differently from the drawing.
Or you see that a plumbing point is slightly misplaced.
Or a niche appears smaller than the approved dimensions.
The mistake may still be easy to correct.
A few days later, after tiling, painting and carpentry, the same mistake can become much harder and more expensive to fix.
Don't Wait for the End-of-Week Update
Weekly updates can be useful. But a lot can happen between Monday and Friday.
A wall can be closed. A ceiling can be sealed. Tiles can cover plumbing. A cabinet can be installed.
By the time you see the site again, an important stage may already be invisible.
Daily does not have to mean long. A useful daily record might take only a few minutes when the site is active.
The point is to capture the right moments.
What the Contractor Should Photograph vs. What the Homeowner Should Keep
Ideally, documentation should not depend on one person.
The contractor or site supervisor may take operational progress photographs.
The homeowner can keep their own project archive.
The designer can document design-related decisions and key milestones.
This creates multiple perspectives.
But don't assume that someone else is keeping a complete record.
That can become a useful routine.
A Simple Daily Photo Routine
1. Establish
Take one wider photograph showing the room and current site condition.
2. Detail
Capture important work, junctions, installations or changes more closely.
3. Hidden
Photograph anything that will be covered or become inaccessible next.
4. Issues
Photograph defects, deviations or incomplete items separately.
5. Record
Save the images with the date, room and stage so they remain easy to find.
That's enough to create a useful project trail without turning the renovation into a photography exercise.
The Photo Folder Should Have a Structure
→ 01 Before Work
→ 02 Civil
→ 03 Electrical & Plumbing
→ 04 Waterproofing
→ 05 Ceiling
→ 06 Carpentry
→ 07 Painting
→ 08 Installation
→ 09 Defects & Rectification
→ 10 Final
You can adapt the categories to the project.
The point is simply that the record should be searchable.
What About WhatsApp Photos?
WhatsApp can be useful for communication, but don't let the entire project history live only inside a chat.
Messages get buried. Images become difficult to locate. A conversation may contain dozens of unrelated discussions.
Important photographs should ideally be copied into a dedicated project folder as well.
The communication channel can remain WhatsApp. The project archive should be somewhere more organised.
Don't Edit the Evidence
Progress photographs are documentation.
Avoid adding filters, heavy cropping or edits that remove relevant context.
You can crop a duplicate image for presentation later.
Keep the original image.
The original is the useful record.
Photos Help With Disputes, But They Don't Automatically Decide Them
This distinction matters.
A photograph can show what was physically present at a particular time. It may help clarify sequence, condition or implementation.
But a dispute can still involve questions about:
- Contractual scope
- Payment
- Responsibility
- Approvals
- Workmanship standards
- Warranties
- Changes
- Delays
So photographs are supporting evidence, not a magic solution.
Their biggest value is that they make the factual part of a conversation easier to establish.
The Best Time to Start Is Before the First Day
Before demolition begins, photograph the existing home.
Capture:
- Existing walls
- Flooring
- Ceilings
- Doors
- Windows
- Fixtures
- Visible defects
- Existing furniture or appliances
- Areas that will be altered
This establishes the starting condition.
Later, if someone asks whether a crack, stain or damage was pre-existing, you have a much clearer reference.
The same principle applies before major installation stages.
Create Milestone Photos Too
Daily photos are useful. Milestone photographs make the record easier to understand.
Useful milestones might include:
Before Work
Record the existing condition before demolition or construction.
After Demolition
Show the cleared site and any conditions revealed after removal work.
Concealed Services
Record electrical, plumbing, waterproofing and other hidden stages before closure.
Before Handover
Document the completed home and any outstanding defects or rectification work.
A Small Habit Can Prevent a Large Argument
Most renovation disputes do not begin with a dramatic disagreement.
They begin with uncertainty.
Was that change approved? Was that damage already there? Was the pipe installed before the wall closed? Was the cabinet altered? Did the contractor complete that section? When did the defect appear?
A photograph cannot solve every question.
But it can remove a lot of uncertainty.
And uncertainty is exactly what allows small disagreements to grow.
The Bottom Line
Daily progress photography is one of the easiest habits to add to a renovation project.
It costs almost nothing. It takes very little time. And it can create a useful visual record of the entire journey.
Photograph before work. Photograph important stages. Photograph anything that will be hidden. Photograph changes. Photograph defects.
Keep the originals. Organise them by date, room and stage. And pair important changes with written approvals wherever possible.
Because when a renovation is moving quickly, memory is unreliable.
A photograph is much harder to misunderstand.
Keep Your Project Record as Clear as Your Design
Before work begins, it helps to visualise the proposed room and keep the design direction clear. You can explore your existing room with Walls to Wonder's Design My Room tool and use the resulting concept as part of the discussion with your designer or contractor.
For budgeting and planning, Walls to Wonder's Interior Cost Estimate tool can help you build a room-wise view of your project before execution begins.
When you are ready to work with a professional, you can explore designers through the Walls to Wonder designer directory.
Final Thought
A renovation creates hundreds of decisions and thousands of physical changes.
You will not remember all of them.
You shouldn't have to.
Document the important stages while they are happening.
Because the best project record is not the one you create after a dispute.
It is the one that quietly prevents the dispute from happening in the first place.
Frequently Asked Questions
Why should I take daily renovation progress photos?
They create a dated visual record of work, changes, hidden services, defects and site conditions. This can help reduce misunderstandings between homeowners, designers, contractors and other project participants.
What renovation work should always be photographed?
Prioritise work that will soon become hidden or difficult to inspect, such as electrical wiring, plumbing, waterproofing stages, ceiling framing, wall preparation and internal carpentry.
Can photos replace a written agreement?
No. Photos support project documentation but do not replace contracts, drawings, specifications, approvals, invoices or other written records.
Should I photograph the house before renovation starts?
Yes. Photographs of the existing condition can help establish what was already present before demolition, construction or installation began.
Should progress photos include the date?
Yes. A dated record makes it much easier to understand the sequence of work and resolve questions about when a change, defect or installation occurred.
Should I keep progress photos on WhatsApp?
WhatsApp can be useful for communication, but important photographs are better copied into a dedicated project folder so they remain organised and easy to retrieve.
Should I photograph materials when they arrive?
It can be useful to photograph relevant packaging, labels or material batches where identification may matter later, particularly for specified products and finishes.
Can progress photos help identify responsibility for damage?
They can help establish the condition and sequence of work, but they do not automatically determine contractual responsibility. Written records and the project agreement still matter.
How often should the site be photographed?
A simple daily record can work well during active construction, especially when important work is being completed or covered. Milestone photographs should also be taken at major stages.
Who should take renovation progress photos?
The contractor or site supervisor can maintain an operational record, while the homeowner can keep an independent project archive. Having a shared documentation habit is more reliable than assuming one person will record everything.
Turn this idea into a plan for your home
Visualise your space, understand the likely budget, or find a professional who can bring the idea to life.